Gosh. Having a puppy takes up a lot of time; just like having a baby! However, I can now report that Millie sleeps through the night, is clean and dry most of the time, and just the most adorable looking dog (just don’t tell her, she already knows). Training as a mechanic will begin soon.
Quite a lot has happened since the last blog, including another trip to Zutphen and the Burton factory.
First off, the pedal assembly has been put together and secured in the car. A trip to the local foundry was necessary to have the accelerator pedal bent to a new shape to fit the, slightly restricted, area tucked over to the right of the footwell. This involved bending the upper part of the pedal arm over to the right to avoid the moulding, and then the lower part bent up to enable (what I hope will be) a full range of pedal travel. Until the body is mounted and the cables connected, I won’t be certain that it will work. I do hope it will, as changing and refitting the pedal assembly will be a real pain.
Along the way, the seats turned up from Cobra. They had converted the original seats (without headrests) to ones with detachable headrests. A really good result, the seats look comfortable, and as far as any BIVA should be appropriate. Thank you Cobra for a great job.
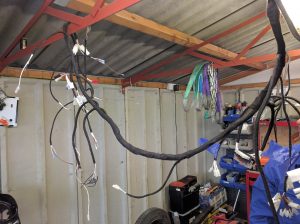
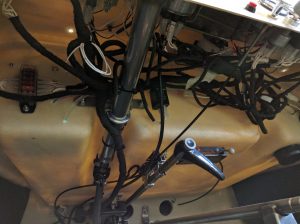
We decided that the wiring loom was the next important item to fix (as does the build manual) and we duly unwrapped it and stretched it along the length of the car, trying to identify what bits went where. Everything was numbered and it should all be easy! Ed and I drew up a spreadsheet to identify the numbered cables in order from back to front of car; and then in numerical order because it was easier to check what wires did what in order to locate them. Pretty impossible and the discussion turned to which side the loom should go and which holes it should use. After trying to lay the loom, first in the car, and then from the rafters, we decided that it might be best for Burton to decide!
A list was made of specific queries and plans laid to go to Holland. “Lets go after the Laon (northern France) rally” we said. “We can zip up, stay overnight and then get back, just adding a day to the Laon long weekend.” Unfortunately, logistics could not be worked out and the idea abandoned. In the event I flew to Holland a week later and drove to the factory in a very small Kia. What a great car! Four door, nippy, quiet, and economic. (Is this review good enough for Top Gear?)
At the factory, I went into the workshop and with the help of their senior mechanic (I’m sorry, I can’t remember your name but who appears in the Burton videos), was able to take lots of photos of their cars in varying stages of build. Wires and orifices and fuel and steering and handbrake locations and fixings all went into the camera for future analysis. Incredibly useful. We also decided that the wiring loom was best run on the opposite side (ie right hand side for RHD) simply changing a few connections to avoid the left indicators flashing when the right hand switch was operated! A new regulator was suggested to replace the original electro mechanical one that I was planning to refit, as the old type becomes unstable from the heat of the engine compartment and allows delivery of too high a voltage back to the battery!
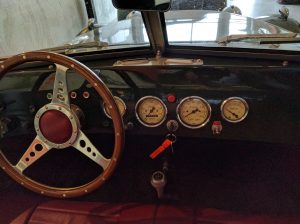
While there, Mark Overbeek, their excellent sales manager, and I, discussed wheels and instruments, the upshot of which was the ordering of these parts for delivery to me in about a month. I think the instruments will look really good, and given the poor state of the original wheels and tyres, the new ones will benefit the cars looks.
The inspection also threw up a few bits that were missing in the original kit Burton supplied, so I took home with me in my bag, among other things,a shorter gear lever, and a bracket for the steering column. Interesting response from Security at Schipol, who put the bits together in the shape of a gun! After reference to a senior officer, and my assurance that I was building a car(!), they let me take the bits on board. Also with the bits were new Burton exhaust brackets to replace the original poor quality Dyane brackets.
Back at the garage, after having drilled yet another hole for the wiring loom to come through into the engine compartment, I turned my attention back to the chassis and engine. Following my photo session, I now knew how to run the fuel line complete with filter, and the pipes up to the pump. I fitted the new exhaust brackets and tightened everything up to look good, and hopefully provide a perfect gas seal.
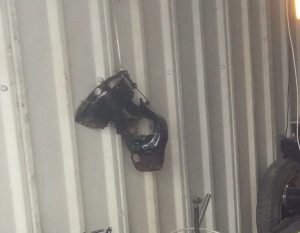
What to do next – of course fit the remaining cowling (that I had hung on the wall and promptly forgotten) around the “pots” and to bolt through to the fan cowling and the heat exchangers. Yet another “Doh!!” moment. In order to replace these bits, I have to undo the exhaust brackets, take the carburettor, manifold and (I think) fan cowling off, and then fit the new cowling. The next job for me to do this week.
That’s all for the moment. A productive time in preparation terms if not in actual activity.
Next jobs to do, apart from the cowling, include replacing the rocker cover gaskets (leaking after the first infusion of oil), and fixing the wiring loom into the body. Once that is done, I would like to refit the “tub” onto the chassis and make sure that the steering column and handbrake brackets can be correctly located and fixed. I might even try the seat/seatbelt framework in the passenger compartment, to make sure I know how it goes together. The factory tell me that the tub does not sit quite square on the chassis but is a few mm off to the right to accommodate the engine – otherwise the bonnet won’t close. I need to keep that in mind for the future final fixing of the body!


