About Keith Noble

Retired, active, and up for new activities led me to building a sports car based on a 2CV.......

48. Gone but not forgotten

I have decided that the time has come to let go of the Burton.  So much invested in it – money and fun, but I need the space, and frankly am in no fit condition to go burying my head in the footwell any more.

So Darren Arthur of 2CV Shop cam up today with his son and put the car on a trailer for more usage down in Wiltshire.  Darren has acquired the UK dealership for Burton in Holland and is proposing to use it as a loan car and demonstrator.  A perfect future for it.

So…..I have a garage, lift, and metric tools….what to do now?

Watch this space

47. The IVA (passed!!!)

IVA certificate issued 14th November 2019.

Well!  After all that I have the certificate.  Not without some stress, though.

Sorting out the outstanding items from the fail was fairly straightforward.  Bolts were tightened, wires and fuel lines secured, fillet (spine of a plastic folder made an excellent one) inserted to level the reversing light/fog light cluster, and seatbelts reversed to correct sides.  Original Dyane steering wheel fettled to fit the removable boss, and finally holes drilled in the side of the car to take new LED side repeaters.

Side repeaters were an issue. The particular location was important and had to be located such that sight lines were at particular visible angles to the rear.  New protractor purchased and holes drilled; LEDs inserted.    Great – except when testing, the LEDs lit at idling engine speeds and disappeared at higher speeds.  Still not quite sure why this happened but the solution was to purchase standard filament bulbs and lenses.  All  then worked perfectly.

Two days before the re test, while checking finally the outstanding items, there was a failure of rear lights indicators and of course, the side repeaters.  Now I have to confess to there being a bit of a mess of wiring under the dashboard; all neat and tidy behind a plastic tray but nevertheless a mess.  Gulp, as I undid the tray and exposed the wiring, and realised that tracing the fault was going to be a nightmare.  Then a lightbulb moment!  Checked the fuses.  Further problem no power to any of the fuses….curious, until I realised that my electric probe was not connected to earth – another untethered wire was!  Faulty fuse found and replaced and everything working.

Day of the test and I was to be at the Test Centre at 0930.  Roy was driving direct to the centre and kindly giving moral support, Ed was driving in my day car to follow me with any support tools that might be necessary in the boot.  We met at the local garage to have a pre test coffee and I then realised that the offside indicators were no longer working; the repeaters were, but not the indicators.   A hurried undoing of the dashboard panel and a realisation that I was not going to find out the problem.

Honesty or cover up?  Ed could stand in front of the front indicators, Roy in front of the rear…..not really.  So I decided to admit to the tester that there was a problem.

At the test, Thomas the tester very rapidly ran through his list and checked that I had done all that was required and declared himself satisfied – and probably a bulb gone so not to worry about the indicators, they had worked for the original test!!

Then he pointed out a large amount of petrol on the filler to the tank.  I had just refilled and it had overflowed, but he pointed out the filler tube needed to be air (petrol) tight. When I could not find cable ties (I was sure I had brought them) he very kindly went off, found some in his office, cleaned up the tube and fixed them on for me!

Then he declared that the car had passed!

I must pay further tribute to Thomas as the Tester.  He displayed all the qualities I referred to before and now showed himself to be unbelievably charitable with the remaining items – thank you Thomas.

Now all that remains is the paper work to secure the registration – whether a Q plate or age related remains to be seen.  However, I will be paying a further visit to the test centre.  On looking at the pass certificate when I got home I realised the VIN number was incomplete.  I now have to return the document and exchange it for the correct numbered one!!

My intention is that this is the end of the blog.   In practice,  I propose completely rewiring the dashboard and cabling that I have added to the Burton loom.  Adding components on an ad hoc basis has led to over complicated and largely un identified wiring.  Also the fuse box needs to be relocated to the other side of the scuttle and inside the engine compartment for ease of access.  That is going to take up my time through the winter and all being well at the first sign of Spring, some fun motoring in the car.

Thank you for reading this.  I hope the blog has been pretty optimistic in my approach to the project, and seeing it through; I have had enormous fun and learning from it.  Once again I must thank Roy and Ed for their ongoing help and at the same time all the very many people who have added their knowledge expertise and suggestions to help me to this point.

If anyone wants any comments/help from me on the car, its construction, or any IVA issues please feel free to contact me at:

kgnoble@cageyenne.co.uk or kgnoble@gmail.com

Goodbye!


46. The IVA (failed)

Finishing off the old to do list was pretty quick and involved lining up the headlights in the garage and adjusting them slightly to calibrate correctly; pinning a few more tonneau clips on to the body; and fitting the ID plates. An enormous thanks to John at all-blank-vin-chassis-plates (find them on ebay) who picked up my order on Sunday and which was delivered on Tuesday with the correct information stamped on the plate

The weather forecast for Thursday remained consistently wet and so the tonneau cover was going to be necessary. I left the passenger seat headrest off so as to fit that side of the cover. It proved to be very useful – driving at a constant 50 mph kept the rain off anyway, in traffic jams it kept the rain out. Small hiccup when the wiper switch came loose and I drove the last few miles with a very fuzzy windscreen; a few minutes and with a spanner under cover at a filling station fixed that problem

Met Roy at the garage and then off to the test centre close by. Waited 25 minutes and then the examiner appeared in the bay, and the test started. We decided to use our well know interpersonal skills and we all chatted away while he went over the car. The actual examination and could probably have been done in a couple of hours, but he was off from 2:30 and had no other tests on the day, and he was obviously enjoying the chat. So the exam took quite a lot longer.

He was actually incredibly pleasant, thorough, and gave good explanations where he found problems. In the end the problems came down to the following (in no order of importance)

Fuel tank brackets underneath – need tightening and washers
Replace leaking master cylinder
Secure loose pedal assembly
Change steering wheel – temporarily use the Dyane but I need to look at steering column and boss connnections
Remove unnecessary id plate (ECAS) on chassis
Fit side repeaters s23 Manual – still don’t understand why!
Fit shim to rear fog/reversing light to angle beam horizontally
Reverse seatbelt catches with button outward facing
Fix fuel pipe and temp guage wires – loose and potentially chafing – secure to fan housing at bottom
Grommet/silicone for wire underside of boot to number plate lamp

So not too much to do.  Of more interest to me were the items I was worried about….

The examiner introduced us to Nigel.  I wish I had taken a photo; Nigel is a bundle of bits of wood and wires and is intended to represent the occupant of a seat, to be protected in any accident, by appropriate seat height, angle, and headrest.  Nigel approved of my seat mods (which will of course shortly be replaced!)

Headlights seem to have been spot on.  My very rough settings seem to have done the trick.  Basically, all I had done was to measure the height and distance between the headlights (main beam)  with the car close to a wall;  marking the centre spots on the wall.  Moving the car back about two metres and comparing the widths and heights and resetting by turning the headlights, and ensuring that the dipped beams were more to the left.   The only real adjustment was to set one of the lamps a bit higher so that they were both at the same height – simple adjustment on the lamp bracket/body.

The brakes, suspension, steering self centring, all passed off without concern.

My concerns about the two speed wipers were amplified when he took out his stop watch – appropriate because the slow speed virtually stopped as well!   But he accepted them.

The front bumper, may not have been necessary!  It is all to do with the floor line and what sits above and below – but he did agree that it might have been a marginal call, so I am happy that it is in place.

All of the wiring (with the minor exception above) seemed to satisfy him as to care in having no bare connections; my putting as much of the wiring into the bellows type of hosing obviously provided a lot of the support and insulation required.

I was concerned that he would want to see a lot of the wiring and kit that was under the dashboard and held in place with my under dash cover, but he was merely concerned about there being no sharp contact.  Heater control and handbrake and gear lever all conformed.

Self installed immobiliser passed without comment or request to see installation or certification (self certified!)

Reconditioned engine (even with bore increased) did not disqualify it from being an original 1980’s engine and therefore low emissions requirement.  It may also help me with a points based assessment for an age related plate – although I suspect the “Q” plates will be awarded.

One of the first things he said when he started looking at the car was that it looked to have been prepared well.  He also thought that Burton had done a really good design job which did account for a lot of the requirements being covered by the design.  From that I think in general terms it is good to demonstrate that the work has been thought through and care taken.   Early impressions count.

Overall the trip was not, for me, unsuccessful.  Relatively simple to make good the unmet required standards, and the first opportunity for a long run in the car.  Making sure my SatNav set me a route avoiding the M25 and M4, it promptly took me off onto the motorways – not recommended for running in purposes by Burton.  Coming back a similar problem, except this time the M25 was stop/go for a long distance.  The engine did not behave too well (overheating?) and stalled on those occasions when I was not “heel and toing”  to keep the revs up.  Got back without any real problems and opened up the garage to put the car away.  Total electrical failure!  So I pushed the car in, and then as though it was laughing at me, the electrics all reappeared;  an investigation for another time…

So for those of you who thought the blog was finished, thank you for staying with me but I am afraid that the story continues!   The work will all be done over the next month or so and the car re-offered for assessment, which should finally produce the IVA.

And then the blog will be finished!!!   Until the next project.

45. Final activity

Satisfying solutions yesterday!

Roy and I took the car out on trade plates to check the speedo.  My attempts to correctly calibrate it had failed, but with a search on the internet found the correct instructions.  Checking the speed over a measured mile and comparing with the sat nav gave a very satisfying close approximation that should conform to the IVA requirements.  So that issue is ticked off.

While we were driving back there was an increasingly serious vibration through the steering wheel which left me puzzled and alarmed.  Rightly, Roy said lets wait until we look more closely at it.

Then we took the car to Wimbledon Carriage and a very good friend Graham Horder.  We were to use his ramp to sort out the leaking exhaust unions.   After a bit of fiddling because the Burton chassis is so narrow, we got the car up on the ramp.  Loosening all the unions gave me the opportunity to ease the crossbox correctly on to the “hangers” and the remaining unions sat nicely to be retightened.  Meanwhile I checked for what might have caused the vibration.  “Look at this” said Roy.  The wheel seems to move against the hub.   Ahh! Lightbulb moment; I had forgotten to tighten the wheel nuts when I was last working on the car.  Doing them up solved one shuddering, but now has me shuddering about the wheels falling off at 50mph (accurately measured!)

While we were fiddling with the exhaust, Graham decided that he could demonstrate how the body work would look if he just polished one wing.  Well one wing grew into two wings, then the boot and then the body.   The car now looks fabulous as you can see in the picture above.

It wont fail the IVA on appearance 🙂

Final jobs to do – fit tonneau cover (bound to rain going to the test) and line up the headlights correctly.   After four years – that seems to be it!

44. New IVA date – 18th July

First off:

Things done since last post:

Jun 2019 x Wire in USB charging point
Jun 2019 x Mark as fog and rear switches in words as well as icons
Jun 2019 x Fit new wiper motor and two speed switch

May 2019 x Re read manual for "floor line" wrt exhaust pipe
May 2019 x Run engine to check for exhaust leaks
MaY 2019 x Look for aluminium trim for exhaust - existing seems 
           to work ok
May 2019 x Query - do we need side repeaters - check sight angles -  
           calculate angles from Pythagorous - length car from 
           side lights - NO!
May 2019 x Order two speed fan blower
May 2019 x Fit new sound box = 3 out of three brackets ok - fitted 
           with longer bolts and broken skin!
May 2019 x Refit seats
May 2019 x Tighten screws in footwell and final fix the immobiliser

Holidays – trip to Geneva for birthday and wedding celebrations; and trip to Laon for the 2019 rally have got in the way of guaranteeing the car ready for the test.

Three big issues have needed to be addressed, and as time was getting very short, I have changed the date of the test to July.  “May I have a test time later than 7:00am, please?”     Nothing available for months, so I have to appear, yet again, at Yeading at a ridiculously early time.  Long way to drive but maybe good to check how the car goes – bad, if it breaks down enroute….

First issue, the exhaust is blowing at least one of the unions; all my efforts to get the new crossbox installed seem to have gone to nought.   So I have used the time in between to    a) Order new crossbox securing bolts from SPOG – designed to be easier to fit;    b) arranged for Roy to come over and help next week (if I can tear him away from his new toy!) ; and c) to take up Graham Horder’s (Wimbledon Carriage Company)  offer to use his ramp – should make life easier.

Second issue, the two speed wiper IVA requirement.    Quite frankly, this has removed any remaining hair from my head.   Citroen used a single speed wiper for their 2CV range and Burton have designed the wiper linkage around these wiper motors, now refurbished.   But the IVA manual is explicit in requiring the wipers to run at two specific speeds and self park.   Having searched high and low for a two speed motor with a similar form factor to the original I have purchased and tried three others – none of which work.  (Citroen did apparently make a two speed wiper for the Scandinavian market, but I have not been able to find any presently available).

Long story short, I have taken another 2CV motor apart and with the help of the web and my testing now understand how the motor and self parking  circuitry work – it is not necessarily intuitive!!    I have also acquired a 20 ohm variable resistor and with a new two speed wiper switch have finally made it work.  For the test I will use a suitable resistor of the correct value, and lose it under the dashboard.

This exercise involved me in removing the wiper mechanism and undoing quite a lot of wiring under the dashboard to investigate.  Putting it all back was going to be a challenge, but I have recruited a new trainee mechanic….

…thank you Janie – couldn’t have done it without you 🙂

Third issue.  Still ongoing, the electronic speedo is still overreading – 70mph down the alley next to the garage? No!  I have moved the pickup for the cable away from the wiper motor thinking that the magnetic field around it might have affected it.  The next attempt will be to borrow some trade plates and drive it along a measured mile to recalibrate.  Watch this space.

Fourth issue.  Headlight alignment.  Maybe easy, when I can find a suitable driveway to give me the required distance for testing, and adjust by the headlamp mounting brackets – or difficult, when I realise there is insufficient adjustment and I have to find some other way.   This will be the last task before the test.

Sometimes I am confident, other times not!  Will the wiring be neat enough?  Will the front bumper be ok?  Is the exhaust pipe end going to be rounded enough?  All the uncertainties relating to the IVA test that have proved to be such “gotchas” which never occurred to me (or Burton!) when I first bought the kit.  The good news about the IVA is that only the failed items need to be retested, so maybe the bulk of work I have done will be good enough.  Speaking to others who have been through the IVA, the testers are very exacting in their interpretation of the requirements, and although I believe the car to be safe on the road, July 18th will be when I find out whether or not I can build a car!!

43. The Bricklayers Lament

First off – list of things done:

May 2019 x Move rear number plate light if rear bumper does not help - 
           rounded so maybe not necessary - ignoring
May 2019 x Re stick wires under wheel arches
May 2019 x No holes in spokes of steering wheel!! - check grommets and 
           full seals - ignored
May 2019 x Stick edging around exhaust end - see how hot it gets
May 2019 x Check if existing exhaust pipe end is curved back on itself and 
           less than 150mm projection
May 2019 x Check on 30deg cone for exhaust pipe and cut end appropriately 
           or rear bumper?
May 2019 x Check headrest requirements carefully - check height now of 
           drivers - can it be made to set at 50mm or be removed to fit a collar
May 2019 x Fit cable cover around mirror
May 2019 x Call to get seats recovered by Garry - collected
May 2019 x Engrave new VIN number

I am clearing most of the remaining tasks, but the major issue these last few days has been to pop in a new crossbox, following the MOT fail.

So ask me about the crossbox…..don’t ask!  Four long days, so far!!

Taking the old one off was not too difficult.  Undid the unions and slackened the bolts on the gearbox, and with some wiggling, it disconnected and down it came!

Then I had to put the new one on.    Nothing lined up easily, and the box kept falling through the space.  The gearbox lugs are designed to be inaccessible, and open such that the box does not sit on the bolts happily, using gravity!  I needed to be on top to hold and guide it, and simultaneously down below to do up the connections

In the end – with the help of the jack, several unsafe bits of wood, plastic ties, a hammer, removing the exhaust pipe, and ordering longer bolts, I am part of the way there … I will never change a 2cv crossbox again!

That however was just the start of it.  In order to be able to get the car high enough for me to get underneath I had used the big scissor jack that sits right under the car.   Not trusting it – with the weight of the engine tilting the car forward, I used axle stands front and rear.

When it came to letting the car down the balance was all wrong and whatever I did the rear stayed on the axle stands. So I raised the car still further and managed to wedge the open bonnet under the roof truss!

This was now getting like Gerard Hoffnung.    (https://www.youtube.com/watch?v=zZUJLO6lMhI)

Lowering the car again to ease the bonnet down, I wedged the rear axle stand. So I pushed down at the front to raise the rear and in so doing re wedged the axle stand directly under the petrol tank – as the car came down, so the stand went up into the tank!  ( I think it might be ok – will check for leaks tomorrow.)

In the end two pieces of wood, one on edge, on the jack, was high enough for me to retrieve the rear axle stand, and lower the jack just as the wood toppled……

I sat down and rested.

Does anyone sell M7 bolts over the counter – Screwfix, Halfords, B and Q?  No chance.  So longer bolts ordered on the web which should come Wednesday, at which point I hope I can pull the two remaining connections together!

Thank you for asking  🙂

Too exhausted to write any more.  Will finish the box later in the week and then it is merely the speedo and the headlights and tightening bolts and checking over the car

42. Ready for the IVA

IVA booked for June 6th!

Work successfully done to date:

May 2019 x Block measuring 53mm high & 136mm wide on the car seat 
           the upper forward corner of the block is then referred 
           to as the reference point the anchorage must be 
           at least 450mm above this point and top of headrest 
           700mm above after <25mm between seat and headrest
May 2019 x Look for tonneau covers fasteners Check if tonneau cover 
           has clips? all Received
May 2018 x Gungum tape on exhaust - no - new exhaust ordered
May 2019 x Finalise fitting bumper - access for bonnet release 
           and fit spacers and nuts under first bracket (maybe with 
           spacers above bumper?
Apr 2019 x Check if 2cv bumper works
Apr 2019 x Seat re upholstery with Garry - call him Monday for 
           Tuesday
Apr 2019 x Bumpers for front to cover somehow the tow eyes at the 
           front sides of the chassis
Apr 2019 x Boot wiring needs tidying
Apr 2019 x Refit regulator
Apr 2019 x Adjust height ch 9.1. [OK - now 16 and 12]
Apr 2019 x Go to Bridges in Pease Pottage for head rests and 
           2cv front bumper
Apr 2019 x Check height 13.0cms front 16,5cms rear - see ch 9.1 
           Burton manual - needs to be jacked up all round for 
           adjustment
Apr 2019 x Stick trim around cockpit o/s
Apr 2019 x Arrange MOT
Apr 2019 x Arrange IVA
Apr 2019 x Cover hole in blower pipe
Apr 2019 x Fit seats 
Apr 2019 x Circlip for choke on carb
Apr 2019 x Rerun red and black wires from battery to connection 
           point behind dashboard - are these necessary now?
Apr 2019 x Secure gear lever - loctite?
Apr 2019 x evidence required of seat belt mounting bolts – 
           take pictures to show them clearly in situ, one each 
           bolt – padding to the seatbelt upper anchorages, 
Apr 2019 x Re run choke cable away from ? handbrake
Apr 2019 x WASHERS - check fuse for power - nothing arriving at 
           push switch
Apr 2019 x BLOWER - check connections to blower unit
Apr 2019 x Undo bolts on front and push them in level with the 
           vertical body - Didn't work
Apr 2019 x Test and tidy up wires in footwell
Apr 2019 x secure immobiliser box on vertical panel behind 
           dashboard
Apr 2019 x Secure bracket for new cable conduit
Apr 2019 x Adjust accelerator
Apr 2019 x Rubber grommet where main cable enters footwell
Apr 2019 x Check IVA manual if repeater lights are necesary NO!!
Apr 2019 x Check if handbrake fouls steering rods
Apr 2019 x speak to Gary / Classic FX (call beginning of April)

Final list of things to do.  IVA manual read yet again; dificult to interpret everything.  Are side repeaters necessary? (pair purchased in case).  How to resolve the seat/head restraint issue – seat squab removed and replaced with hardboard, to be recovered by Garry in the thinnest of materials to keep below the 700mm requirement.

Solved – problem with the 30 degree cone and the front of the car.  New 2cv bumper purchased and fitted – inverted – see photos; not too bad looking.  Got the interest of both Burton and the Burton Owners Club (now written up on their web page and see below)  Result.

Suspension raised to Burton manual levels, which should improve handling.

Taken for MOT.  Great to drive the car legitimally to and from the test centre.  Failed!  But brakes and steering are all ok, which was my main concern.  Other issues flagged up were screen washers pointing in the wrong direction – easily fixed; headlights out of alignment – knew that and will set them nearer the test; two holes in the first soundbox – thought it sounded good!  New (rhd) soundbox ordered from der Franzose as neither Burton nor ECAS had any.   Emission test all positive – even for a more modern engine standard!

Very kind offer from Graham Horder of the Wimbledon Carriage Company to use his facilities, which include a proper car lift, and help the replacement of the soundbox – thank you Graham!  Will be taking him up on the offer as soon as the soundbox arrives.

Main outstanding items relate to points in the IVA manual that seem to be contradictory or generally unclear. For example side repeaters may or may not be necessary; rear of car may fail 30 degree cone test because of the exhaust – do I take an angle grinder to it and risk being right under the fuel tank, or do I wait for that as a fail for clarity!

Only other items are edging the internal mirror with a cable cover to provide cushioning; checking the speedo and calibrating it accurately. When going to the MOT centre it was showing 100mph!! (Shurely not).  Finally (I think) re engraving the VIN number so it is clearer and in a more accessible position.

I am collating paperwork with photos of the build, copy bills and correspondence with the DVLA (I want an age related plate if possible rather than a Q plate).  I think I might need these at the actual test.  I am also taking a copy of the IVA manual to demonstrate that I knew (?) what the required standards are.

June 6th is coming closer 🙂

article for the Burton Owners Club – click here

41 Nearly there (again)

Busy time over the last couple of months.  Looking back over my ToDo (done) list shows the following:    (but skip because they are largely boring and only for me to be able to check up on.)  Scroll down….

Jan 2019 x Sell wheels/tyres in EBAY
Jan 2019 x Secure all wires/cables in cockpit
Jan 2019 x remove -ve not +ve on battery for safety
Jan 2019 x measure screws for steering wheel
Jan 2019 x Buy fuel for tank
Jan 2019 x Check spark plugs
Jan 2019 x Connectors for side/indicator lighting
Jan 2019 x Check out electrical function of everything
Feb 2019 x Fix fuel gauge not working
Feb 2019 x Fix electrical problem with side/brake lights
Feb 2019 x Fitted passenger seat with spacers
Feb 2019 x Re time ignition - if necessary - check with strobe
Feb 2019 x fit push button near brake light on dash
Feb 2019 x Fix headrest
Feb 2019 x Open up drivers seat headrest
Feb 2019 x Check height of head restraints - check IVA 
manual - see notes
Feb 2019 x Road test
Feb 2019 x Tighten mirrors
Feb 2019 x buy and fit bonnet stay
Feb 2019 x Refit bonnet
Feb 2019 x Check if the fuel filler is fixed with a tie to 
the rubber hose 
into the tank
Feb 2019 x Glue centre of decorative hub to road wheel (nsr done)
Feb 2019 x Fit large washers in footwell from osf wing - not 
necessary
Feb 2019 x stick brake lines to rear swing arms 
2019_02_17 n/s done)
Feb 2019 x Bleed brakes 
Feb 2019 x Fit covers to bolts in footwell
Feb 2019 x Pump tyres to 1.8 bar
Feb 2019 x Fit profiling on steering wheel
Feb 2019 x ordered new electronic speedo in mph and cable sensor
Feb 2019 x chain for fuel filler
Feb 2019 x stick wires under wheel arches
Feb 2019 x Use big jack to see how it helps for brakes etc
Feb 2019 x stick vents under wheel arches
Feb 2019 x Check brake pedal assembly bolts for nyloc - and on 
steering box
Feb 2019 x Fit new headlamp lenses and bulbs
Feb 2019 x measure speedo for mph dial


Mar 2019 x Bonnet lock 8.8 Burton Manual
Mar 2019 x Request Burton ID plate
Mar 2019 x Fix heater control on o/s/f heat exchanger
Mar 2019 x Ease heater controls
Mar 2019 x Fit Burton logo onto boot lid
Mar 2019 x Fit new electronic speedo - wiring done needs test and 
finalising wire


A quick look through to remind myself and basically we have bled the brakes, sorted most things under the bonnet, fitted the bonnet and test driven – see videos.

Substantial issues have included obtaining and fitting a new electronic speedo, MMB supplied to match the other instruments, but electronic which is the only mph version they have.   Another issue is the head restraints which I believe according to the IVA manual are too short, but which Cobra assure me are ok!  We will see…

Also, I noticed that when I pressed the brake pedal the front side lights illuminated,, the fuel guage stopped working and the indicators turned out the brake lights!  Eventually traced to wrongly fitted earth to the o/s rear light cluster and a faulty bulb holder – replaced and all works.

Then the heater cable jammed – stuck under the body – but swiftly resolved by forcibly bending the arm just enough for a clearance.

With the bonnet fitted and the brakes done we took the car for a ride around Horsley Towers (thank you for the use of the roads there

What fun!  The three of us took turns in driving up and down – and getting into 4th gear! The engine ran sweetly and one of the few remaining potential problems looks to be the amount of positive camber on full lock.  The way to improve that seems to be to cut some off the swing arm and weld back the kingpins……not for me!  I will see what adjustments I can make to improve it.  Burton give heights of the chassis off the ground and I will be checking those finally before the test.

The test application forms are completed and just have to be sent to arrange for a test date.  Burton are supplying a Build Plate to which I have to add (I think) a Citroen plate with weights on, and I also need to engrave the VIN number again to make it more legible; using a Dremel freehand to write characters is a problem.

I have been over the IVA manual again and again to make sure nothing has been missed – test light to check the brake fluid light, symbols on switches, chain to tether the fuel filler cap, immobiliser (!! more later), profiled covers on footwell bolts, and some more I cannot now remember…..

The immobiliser needs to be wired in.  To pass the IVA test it has to provide a break in the ignition circuit and either the starter or fuel pump; obviously not the latter as the pump is mechanical.  So, the manual says hide all the wires or make them look like the original loom.  I don’t think I am going with that.  As far as I am concerned the immobiliser is there because the IVA test says it should be.  I have a removable steering wheel, a gear lever lock and an ignition key – enough.  So my plan is to take the line of least resistance and make the connections on the ignition switch and the starter switch.  Hidden in full sight 🙂

My ToDo list is now basically reduced to headlight alignment, tracking and the immobiliser. All will be done next week.  Ed has kindly arranged for the car to be driven over on trade plates to The Wimbledon Carriage Company “purveyors of fine carriages in East Horsley” – our friend Graham Horder – and to have it cleaned and polished ready for the test and, if possible, influence the tester.  And then to await the test date.

40 Update

Spent a while at the garage on New Years Day (to try to avoid o/d’ing on all the left over food!) and the day after.

Achieved:-

  • Connected heat exchanger outlets to vents and made permanent the connections with plastic ties
  • Reconnected the carb to its supports and remade the hose connections
  • Covered the sidelight cables in heat resisting sheathing and proved the wiring to the lights/indicators
  • Re-stuck trim around cockpit edge
  • Undid the carb hoses to allow the headlamp bar to be fixed across the bonnet – and did them up again

Failed:-

Tried to use the Burton jack to get the wheel off and gain access to the area under the mudguards.  The suspension is so low that I cannot get it under the swing arm. Tried to use the block for punctured tubes to increase the height – but just pushed the wheel over and off the ramp!   Solution – used the proper jack under the swing arms.

To Do:-

At this stage my goal is to complete everything under the bonnet, which is pretty well there, and then fit the bonnet.  I can then seriously test drive it to see what problems occur; I anticipate brakes needing bleeding, tracking still to be done; investigate the suspension height, as the body weight and other factors may have altered; fit immobiliser; new screws for the steering wheel…….   And then all the other odds and sods I have forgotten, including tidying up the wiring runs!

Comment:-

Gosh!! There is no room in the engine bay with the body on!   Looking at it, I cannot see how service jobs like replacement of sparkplugs, or even retensioning or fitting the fan belt, can be done!

Done 2018 to date:


Jan 2018 x Engine arrives
Feb 2018 x New engine in
Feb 2018 x Engine out 
May 2018 x Remake electrical connections under wings
Oct 2018 x Clutch and heater cables into corrugated hose?
Oct 2018 x Redo fuel from filter
Oct 2018 x Reconnect starter cables
Oct 2018 x Oil in engine
Oct 2018 x Put battery back in charge
Oct 2018 x Find charger for electric spanner
Nov 2018 x Engine and car runs
Nov 2018 x Reassembly of engine and peripherals completed 
Dec 2018 x Re run bowden connection between heat exchangers

39 Is this the penultimate report?

Spent a couple of days rewiring the side/indicator lights so that I can make an easy break with suitable connectors if the body needs to come off again.  Wiring diagram consulted again to ensure I made the correct connections.  Burtons idea of printing a unique number on each wire would be a better one if I could read them without a magnifying glass!   Cables were stuck with Gorilla glue to ensure that they are not fouled by the wheels within the wings.

Friday saw Roy, Ed and me at the garage gingerly taking the body from its storage and placing it on the chassis.  A bit of wriggling and we got it on, over the rocker covers and locating it with the previously bored holes fixing to the rest of the body.  That involved Roy and I – independently – going headfirst into the footwell to tighten the bolts.  Regular readers will know that I have done this before and have been able to get in and out fairly easily. However the combination of advancing years, a healing broken elbow and sharp neck pains meant that I really found it difficult to get myself out again.  If I am allowed a personal comment I have to confess that on the rare occasions when I have a bath (as opposed to a shower!) I am finding it very difficult to get in and out of said vessel!

With Ed and I crawling around in the dirt locating and screwing bolts under the car as well, we got to a point where the body was on successfully, and requiring little more to finalise its fixing;  The original holes all linked up to make the bolting through easy – apart from one at the base of the offside wing which required some extra time, eating dust, drilling and refixing. The main thing now being the bar that holds the coil and the headlights.

On that point, certain worries pushed into the back of my memory are now coming to the fore.  The Burton supplied headlamp lenses are for a LHD car and therefore the beams set incorrectly.  As per a previous blog entry I have acquired new (old) RHD lenses to refit.  I understand the the removal of the old (new) lenses requires baking in an oven to loosen the adhesive.  I need to wait for a suitable opportunity when Mrs N is out of the kitchen for some hours!  [update]  Have now purchased a heat gun and seen how one can make a suitable oven in a cardboard box – Hmm!

Other jobs still to do under the bonnet include; fixing the vents from the heat exchangers so the heat discharges into the wheel arches, and now the full  weight of the body is on as well – checking the tracking again and tightening up the fastenings on the track rods.   I also need to reassure myself that on full lock the wheels do not foul the wheel arches – certainly the wheels go over at an alarming angle, as well as making the steering harder (caster effect?)

I keep thinking of more jobs to do but I do want to try the car out under slightly more realistic road conditions.  I propose speaking to the manager of Horsley Towers (a stones throw from the garage) to see if I can use their relatively extensive metalled road network.  That should inform as to the accuracy of the speedo (still needing to be converted to imperial) as well as acceleration and braking performance.

Once that is done I will finalise the outstanding work and put in for the IVA test.

More to come shortly

38. Phoenix rises

Well its been a long time!

The project has gone incredibly cold for a variety of reasons, not many of which I can actually remember….they do include, however, the purchase of a flat in the Isle of Wight as a holiday home – and its kitting out, the decision to buy a recon engine from Burton with the slightly larger bores (so 652cc!), difficulty in mating the engine with the gearbox, and more recently a sailing act of stupidity resulting in a broken elbow.

But Ed, Roy and I decided to finish off the installation of the new engine, get all the wiring and plumbing done….. and guess what, it started.  A few farts and flames from the exhaust and a while for the engine to settle down and run evenly, and then a little later, a run around the block.

While running the car around the block I noticed that I had not tightened up the steering rods, which reminds me I still need to do the tracking; I also need to finish of the wiring under the dashboard and check on the non functioning speedo.  But it is only these few(!) things that delay the re installation of the body, further road testing and then the IVA.

The winter should provide an opportunity to finish everything off and have the IVA done in the warmer months of the new year.  That is Plan A  – and there is now no Plan B!

37. Decisions

The leak is still there!    Furthermore, unlike previously I couldn’t even run the engine – which is possibly down to an old and very silted up carburettor.

It seems that I am unable to seal one of the pushrod guides into the block, adequately.  Looking around the internet there are lots of stories of crushed guide tubes, but none that I can find with my particular problem.  The Burton website shows a video of fitting a head to the block and it seems to have more mobility than I can achieve when I try to waggle it about to fit.

So what are my options.    They seem to come down to a straight binary choice –   either a new head (rather than 2nd hand)  or a new (recon and bored out 652cc) engine.  Slight difference in cost (!) but either a still uncertain future for my grandsons motoring, or a speedier and more reliable option.     I haven’t decided yet – but there are still a few euros left over from the French house sale and they might be diverted to Burton.

Its late and I am going to sleep on it…….

Work done 2017 to date:

Jan 2017 x Jack up rear of car - remove wheel - drill through the remaining holes for rear wings
Jan 2017 x Fit gasket between mudguard and body
Jan 2017 x Fit windscreen and accessories
Jan 2017 x Tether the fuel cap - not necessary
Jan 2017 x Fit new steering wheel
Jan 2017 x Decided not to tie down the brake line between master cyl and caliper to gearbox and maybe to bulkhead as well
Jan 2017 x Fit push pull heater cable
Jan 2017 x Keep existing terminal end for accelerator cable
Jan 2017 x Order Brake fluid sticker needed near cylinder and fit 
Jan 2017 x Insulate cable from oil pressure up to connector 6
Jan 2017 x Check rear exhaust fastening * photo looks odd
Jan 2017 x check diameter of steering column 50 mms
Jan 2017 x measure wheel arches for length of body trim- Burton aleady supplied but http://www.martrim.co.uk/catalogue/wing-piping.html for supply
Jan 2017 x Fix wiring in cabin support wiring in cabin with sikaflex
Jan 2017 x Measure and fit rear wings
Jan 2017 x mount heater control
Jan 2017 x choke cable drill body to take choke
Jan 2017 x shorten accelerator cable

Feb 2017 x Find missing bit of choke cable 
Feb 2017 x Fit new spark plug leads
Feb 2017 x Buy rubber cover for +ve battery terminal 
Feb 2017. x Refit heater control to immediately right of steering column
Feb 2017 x Drill for top dial as high as possible
Feb 2017 x Check visibility from wheel for dials and switches - speedo and rev counter horizontal
Feb 2017 x Locate and drill dials
Feb 2017 x Make electrical connections in boot 
Feb 2017 x Fit choke cable to dash inside exempt zone and next ignition switch
Feb 2017 x Fit front section of body - after engraving
Feb 2017 x Glue grill to front of body p3 8.4
Feb 2017 x Fit front to car
Feb 2017 x Turn car round 
Feb 2017 x Check visibility from wheel for dials and switches - speedo and rev counter horizontal
Feb 2017 x Fit choke cable to dash inside exempt zone and next ignition switch 
Feb 2017 x Decide final positions of switches and drill for switches - ignition/starter/lights/indicators
Feb 2017 x Fit choke cable to dash inside exempt zone and next ignition switch
Feb 2017 x Fit new front tyres
Feb 2017 x locate and fit flasher and indicator relays
Feb 2017 x Lay tape along front where bonnet touches
Feb 2017 x connect n/s brake and side lights - check on which brightness
Feb 2017 x Fit o/s/r wheel
Feb 2017 x Remove front and store in other garage
Feb 2017 x Screw down demister vents, cut out and fit blower Manual:- p9 7.10
Feb 2017 x Run conduit behind lock catch bar in boot
Feb 2017 x fit reversing/rear fog light
Feb 2017 x Fit blower to underside of vents
Feb 2017 x Refix drilled sections for blower and recalculate and drill 80mm
Feb 2017 x Fit boot stay
Feb 2017 x Buy Handbrake pull switch (http://www.cobraclub.com/forum/showthread.php?t=54282)
Feb 2017 x Buy matching MMB indicator lights
Feb 2017 x Buy switches - see notebook
Feb 2017 x Look for blower kit in box or maybe packet - see photo
Feb 2017 x Buy relays for horn/headlights
Feb 2017 x Buy indicator/hazard (as per Pembleton)
Feb 2017 x connect n/s brake and side lights - check on which brightness
Feb 2017 x buy sikaflex
Feb 2017 x where does middle of exhaust bolt on to
Feb 2017 x Check brake assembly bolts - they need Nyloc nuts to secure
Feb 2017 x Nyloc nut on bottom of column - onto rack
Feb 2017 x Undo RHS wiper nut and try to move forward slightly (plate is slotted) Move wipers forward on RHS
Feb 2017 x Location of switches and dials - maybe Burton are IVA
Feb 2017 x Check requirements for wiring and operation of fog and reversing lights
Feb 2017 x Anchor all wires and pipes every 300mm
Feb 2017 x Reset wiper links below
Feb 2017 x Look at manual for blower extra bits -
Feb 2017 x Reconnect small wire under rubber connector cover to starter
Feb 2017 x Review Burton switches - not IVA compliant
Feb 2017 x Fit proper connections for Connector 6
Feb 2017 x Look at the exhaust pipe end and shorten the exhaust by re fitting at centre silencer 
Feb 2017 x Fit washer and wipers
Feb 2017 x Fit quick release steering boss
Feb 2017 x Find and fit wing and rear mirrors
Feb 2017 x Fit petrol pipe and cap
Feb 2017 x Check plate for removable boss and steering wheel and maybe connect
Feb 2017 x Fix wiring in boot with conduit and fix with adhesive
Feb 2017 x Found - Bracket to hold steering column - needs 35mm U bracket (look in garage find brackets for steering)
Feb 2017 x Fit steering bracket - remove and refit when steering column fouling tunnel

Mar 2017 x Check front lighting for an amber light
Mar 2017 x Relays for - head main / head dipped / horn / 
Mar 2017 x Bolt on body at front
Mar 2017 x Create holes in front body for heater vents
Mar 2017 x Mudguards on
Mar 2017 x check burton manual for height of chassis above ground with everything fitted
Mar 2017 x Height and springs
Mar 2017 x Replace front body
Mar 2017 x Remove cable cover from boot to cockpit to fit new cable for reversing light
Mar 2017 x Connect battery 12v +ve direct bypassing ignition to dashboard USB outlet and utilise for all +ve connections similar NOT CONNECTED YET!)
Mar 2017 x Fit remaining switches
Mar 2017 x Fix headlight / coil assembly
Mar 2017 x buy petrol
Mar 2017 x Fit new spark plug leads
Mar 2017 x Fit extra fuse - check if direct to battery
Mar 2017 x Fit new speedo cable at gearbox and instrument end - might not work!!
Mar 2017 x Considered reversing gearlever support
Mar 2017 x Blower connected and works
Mar 2017 x Windscreen washer connected and works
Mar 2017 x Horn works from indicator switch
Mar 2017 x Proved reversing light and fog light connection

May 2017 x Check height of head restraints - check IVA manual
May 2017 x Check seatbelts for seat belt mounting bolts not marked us as 8.8 ton breaking strength
May 2017 x Fit safety belts 
May 2017 x Fix boot lockMay 2017 x Fit foglight unit
May 2017 x Drill and fit washer nozzles
May 2017 x Drill for washer pipe from reservoir to nozzles
May 2017 x Find problem with electrics
May 2017 x Fit buzzer for indicators
May 2017 x Large washers under engine mounts
May 2017 x Tidy wires under dash
May 2017 x No clicks on indicator

Jun 2017 x Sika flex under mudguard
Jun 2017 x Fix boot lock
Jun 2017 x Centre for steering wheel
Jul 2017 x [one side done!] Wire and plug/socket fix for under mudguard lights
Jul 2017 x Fit Mudguard bars
Jul 2017 x Adjust handbrake - tighten
Jul 2017 x Bolt mudguards to front body
Jul 2017 x Check hand brake - should start binding at 3rd notch and full on for 5th
Jul 2017 x Proper screw for speedo cable gearbox end
Jul 2017 x hose clamps for all hoses - 2 for reniflard to airfilter
Jul 2017 x Check alternator output
Jul 2017 x Physically fit immobiliser Decide and locate (under somewhere)
Jul 2017 x Check and adjust suspension height 
Jul 2017 x Engrave VIN number
Jul 2017 x Assemble shelving
Jul 2017 x TEST accelerator, clutch and brake and steering

Sep 2017 x Check for oil leaks ? rocker covers
Sep 2017 x Fix whatever necessary from road test


36. Oh dear!!

Well, since the last epistle, things have been pretty quiet at Cageyenne Autos.  Other things have got in the way, and without giving a life history, the motorbike has gone, the house in France has gone, an apartment in the Isle of Wight has appeared………and a bl**dy oil leak from the near side of the Burton.

Sadly that has entailed removal of the bonnet, front body and all of the wiring that has got in the way; the heat exchangers, the manifold, all the carburettor connections, all have come off to be able to investigate.

The oil leak was seen to come from the  pushrod guide tubes. Off with its head!  Unlike many cars the head has two aluminium tubes running from the underside and which are intended to locate the pushrods onto the cam followers in the block.

If, when the head is refitted, it is not done with extreme care, the tubes crush where they enter the block, distort the rubber seal and thus the oil leaks.The tubes are removable but only with enormous dificulty – ECAS’ website says don’t attempt it.  Those who have done say it can  be done with a hacksaw but my attempts to saw cut into the aluminum head and (probably) caused even more damage.

So a second hand head has been obtained (thank you Martyn Wilson) and has now been refitted.  Valve clearances checked and all the bits screwed up.  Then the banjo oil feed bolt fitted and tightened – too much and sheared – new one ordered.  Then it was obvious that one of the manifold bolts thread had gone. New longer one ordered (rather than fit helicoil at this stage) as it is one that can be bolted through.

So that is where we are at now.  Next week will see the bits reconnected and the engine run to see if the leak has been fixed.  If that is the case the next blog entry will proudly show the rolling chassis and then the body refitted

34. End of the build

Well here I am at midnight on the night of 31st March 2017.   I gave us until midnight today to complete the build……….and sadly, we didn’t quite make it.

The photo shows the car in its best light and I could make the claim that it was all done – but I know what is missing.   Still the self imposed timing certainly added impetus to our work.

The mudguards took longer than expected, the simple act of fitting the headlights and wiring them up (loom for a LHD car, in a RHD car!) and the sheer detail of all the little things that were set aside to get the body sorted properly.  If I look at my list of work done in March this year alone, it seems comparable to work that was taking months in the previous years.  A lot of drilling holes in the body, that has always been my main concern in getting them wrong!  In fact, apart from a few minor “moments”, it seems to been ok.

What is left to do, amounts to some wiring (and tracing the wiring for non functioning instruments); setting up the side lights as indicators and obtaining amber lenses for them, because the British and Dutch requirements are dissimilar (and as an aside, the EC has not made my life easier by not having a common approach to vehicle construction and use).  I need to do the tracking, as warned by Callum, it would be out when the suspension was dropped; and I need to fit the seatbelts and the seats.  In the event not much, but time consuming.   I am mentally calling these items “service and maintenance” rather than “construction”, but I fear I am only kidding myself.

Finally, will come the big test – the IVA.  Before then I will get the car to an MOT test centre to check basics such as brakes, steering and lights, and once that is clear will set about trying to negotiate with the DVLA about the type of test and whether I can keep the original registration.

Thank you all for staying with me on this blog.   To all of you who have visited and commented, or just chatted about the project, thank you; that interest has helped me maintain my enthusiasm right the way through.

I am amazed how time has gone by, how my knowledge and experience has expanded, and how great it was to be able to rely on Roy and Ed to help get it all done – Thank you  both again.

I have always said that the building of the car was a journey and to be enjoyed as that; what the arrival will be remains to be seen.

To Burton

                                                                  From Dyane


33. Start of the finishing touches….

Trying to put the front mudguards has proven to be a bit of a chore.  Careful measurement and placement of the mudguards onto the front body resulted in a realisation that the wheels would foul them when on alternative locks.  Cue reviewing thousands (well tens!) of photos of Burtons to see if we were actually placing them in the correct position.

In fact, the thought dawned that a) the suspension needed to be lowered to the heights in the Burton manual and b) there are “bars” to push and support the mudguard by bolting the mudguard and body together at a low level.  The build manual also shows that holes need to be cut in the sides of the front to allow the heat to escape from the heat exchangers.   Enormous care needed to get these holes in the correct position as it seems very easy for the mudguard not to cover them when fitted.  Decided to delay the holes pending final measurement and fitting.

Wiring and instruments are proceeding apace.  After much concern I decided on the dashboard layout for the dials and switches.  I had already fitted the ignition switch, choke and light switch; I now added the two remaining dials, and switches for the wipers and blower on one side, and on the other switches for the hazards, fog and reversing lights.  I think it works quite well and the important dials and switches are easily to hand.

Cometh the day for lowering the suspension. Instructions are to raise the body and allow the swing arms to drop to allow the tie bars into the coil springs to be loosened and the body to drop.  The effect of changing one end can change the setting on the others so it has been (and will continue to be)….

jack up car to free all wheels, undo the tie bars, drop the car to remeasure

jack up car to free all wheels, undo the tie bars, drop the car to remeasure

jack up car to free all wheels, undo the tie bars, drop the car to remeasure

…..repeat as necessary.

Ooops!  Undoing the nearside front tie bar resulted in the bar coming undone completely.  Burton do a longer version which will now be ordered to replace the existing and allow the suspension height to be reduced safely (15mm minimum tiebar inside the eye.      However this has all resulted in a lop sided car!  Still need to work out why, but I think the tiebars still need further careful attention.  [update – longer tiebars have arrived and will be fitted “shortly”!]

In the meantime, the mudguards are now being fitted.  Roy and I measured up and drilled the holes and the rubber fillet is being glued to both sides.  We also very carefully measured where the heat exhaust holes from the heat exchangers, go and with my heart in my mouth, drilled out a 15 cm hole.  Fortunately, currently only on the offside, it fits!

More wiring.  Why does the reversing light dim when I switch it on with the builtin LED? A look at the pinouts for the switch shows that it needs a direct line to earth; that works. However, in the meantime, I have purchased an inductive proximity device which should read the gearlever in reverse and trip a relay to switch on the reversing light, switching it off when the gear is disengaged;  it will be fun testing this out!

I have needed a feed to the charging socket fitted on the dash so there is now a convenient point to pick up both permanent positive and negative feeds behind the dash.  I will need these for the extra fog light latching unit as well as the indicator and hazard units and the immobiliser unit.

Headlamp holder fitted after much fiddling to move the air filter to allow it go across the engine space.  This required more drilling to the front body, and will require a commensurate amount out of the bonnet.  Checked out the headlamps…..nothing to secure them to the bar; not sure if the nuts should have been supplied but they are now ordered.  But!.  I believe the headlamp lenses are for left hand drive cars…..  looking at the ECAS site they emphasise the problem and in fact only have LHD in stock.  I think a call to Martyn at Classic 2cv Recycling may help in some way.  I do have the original Dyane lamps which would not fit – even if they were in a fit state!…..

…..£28 now sent to Martyn and RHD lenses on their way.  Martyns notes make the point that ones wife should not be allowed to know the process for removing the lenses as it requires the use of the oven!  Jane – please do not read this!

I have Roy and Edward round on Tuesday and I hope that we will finalise the mudguards and fit the bonnet and lights sufficient to claim the end of the build – and done by the end of March!!  Champagne all round.

Only one other brief item of interest – the car has been entered into the ballot for the Shere Hill Climb, a regular event to be held later this year.  As a team we have no experience of hill climbs – and certainly I do not know of any 2CV or derivative doing well in one of these events. However, it is another challenge to look forward to; if we win the ballot!

Then it is back the following week to deal with all other outstanding items as “service issues”    🙂

31 On the home straight……

Body off!   All that hard work in drilling the holes to hold the body and then crawling inside to tighten them up..  all undone again to enable Ed and I to test the engine, run it up and make sure there are no more leaks and to test the comfort of the clutch the efficacy of the brakes and the amount of play in the steering.

Prudently we pushed the car halfway out of the garage.  We put some fuel in the carb and I sat in the cockpit.  Much pulling on the choke, and pressing and releasing the accelerator and eventually the engine fired.  It ran very lumpily for a bit and then died. More fuel in the carb and start again………. why could I see a flame burning in the carb?

I now know it is possible to get out of the car very very quickly!!   I was out,  literally in a second, and found a cloth that I used to smother the flame.  All out and panic over.  Do we tell anyone, we asked ourselves?  No, lets keep it a secret – so please, dear reader, please, keep it to yourself.   Amazon account immediately utilised for an extinguisher and fire blanket which will be kept very near by.

Called it a day after that.

Next visit I was on my own.  Having found that the speedo needed a cable different to the Dyane original, it was duly ordered and delivered from Burton.   Let me say at this point to aspiring builders – if you know what instruments you are having and are still building the engine and gearbox – now is the time to change the cable.  Not when everything around is fully assembled!   I have had a very difficult time in removing the old cable from its inaccessible position.  Eventually, I was able to undo the securing bolt and pulled on the cable…..too hard as it turned out, half the gearbox came out with it!  Well an exaggeration a bit, but the assembly including the drive gear all came out and distributed itself on the floor.  After some time, grazed knuckles, and a lot of unseemly words, I have reassembled it.  Whether it works is another matter, time will tell when I can do a road test.

I was determined to get on with stuff under the dash.  Out came the seat again and in I went upside down.  The short story is that the windscreen washer, the blower, the horn, the fog and reversing lights all now work.  I must unusually criticise Burton and their wiring.  After a lot of mucking around with the test meter and connecting and reconnecting wires, it was apparent that they had wired the connection plug from the wipers incorrectly.  Spotting it and redoing it solved the problem in time.

The next effort involved getting the car out of the garage without bursting into flames. Doesn’t look that different from the previous video but there are of course lots of new bits completed..   Shame about the gearlever becoming detached; a little modification, on the go, and it should all be ok now.

Watch here:-

Just got to finish the body and do a bit of servicing and adjusting and we are nearly there.

Wow!!

30. Looking more like a car


Remember this?

We have come quite a long way since!   Twenty one months ago, or thereabouts, this was what I saw in a field and decided it was the one!  It has been great fun and the reward is seeing the car gradually grow in front of me.

With more than a little help from my friends Ed and Roy, we have got to this.

Having read all the comments about how difficult it would be to mount the front body, and with the manual suggesting “make more space” if it didn’t fit (how do you do that?), the body went on pretty well.

A snag was the fuel filter which inevitably was in the wrong place for the body to be placed onto the chassis, but that was easily solved by cutting the pipe and running it slightly closer to the engine.

I fitted a smaller fanbelt and bolted the alternator lower, and despite my absolute conviction that the air filter would not fit below the bonnet – it does!

Bolting the body from inside the footwell was a problem, mainly of my bulk.  Next project I build, one of my grandchildren is going to be the one who goes inside and does the bolts up.  In between the gear lever, the handbrake and the dangling cables there is not much room!

Next job is finally drilling the holes for the switches and instruments. To do that the seat has to go in yet again – and at that point I can start the engine and check out the clutch, gears, accelerator and brakes.   My sincere hope is that everything will be ok in the engine compartment, because there is certainly no room for a spanner!!

Back soon….

29 and three quarters…

Just wanted to confirm that I have fixed the demister.   The problem was in part, how to avoid fouling the wiper mechanism under the dash, and also how to fix the tube to the underside of the vents.

Problem one was solved by moving the vents as far back as possible within the constraints of the bracket holding the windscreen (solved another issue by drilling out the thread in the bracket and bolting through – much more convenient).   Problem two simply expressed is how to fix the tube without being able to get to the underside to do up the bolt.   Solution – drill a hole directly underneath to take a socket on an extension, hold the nut with bluetack in the socket and voila!  Just need to tape over the access hole and it all works.   Took ages to work out and no time at all to implement!

While working on the demister, I took the opportunity to scope out putting a pull switch on the handbrake.  This is necessary to be able to show when the handbrake is pulled up, and, for the IVA, to show that the brake fluid warning lamp works.  This requires a little bit of wiring – effectively to short the brake fluid master cylinder switch and therefore light the lamp, when the handbrake is on.

I also took the opportunity to fit a combined rear fog and reverse light.  It is LED and looks fairly discreet above the number plate.  Regulations from 2013 require that the rear fog light may be switched on when the headlights are on, and must go off automatically when the headlights are turned off; and then may not come on again until the fog light is switched on again.  

The intention is to prevent leaving the light being active again on returning to the car and driving off in fog free conditions.  Car Builder Solutions do an electronic box that handles the latching and unlatching of the circuit and I will be wiring that into the circuit.

I am also investigating making an inductive proximity switch that will latch on when the gear shift lever goes to the reverse position and then off again for any other gear.  This would then operate the reversing light automatically removing the need for another switch on the dashboard.  It also avoids the need for replacing the rear of the 2CV gearbox to a newer version that is capable of taking a proper reversing light switch.

Watch this space…

29 and a half…..

Went back to the garage today to fit the demister.  Aaargh!  How I wish I had bought a LHD donor car.  Every now and then I get caught.  Today it is evident that if the demister tube goes from the right hand side there is room…..from the left it fouls the wiper mechanism.  More of windscreen off – new holes drilled and maybe I will be able to fit it properly over the weekend.

Yesterday was also a disaster, related to the demister.  The blower fits onto the bulkhead behind the dashboard in the area occupied on the other side by the washer. Again the shape of the tub is not consistent with setting the blower neatly; this resulted in my drilling an 85mm hole – in the wrong place.  The cutout disc is now back in the body secured by sikaflex and will be redrilled shortly, now that I have the correct 80mm router!  It should all be covered eventually.  However in locating the blower, I discovered the heater control could not stay where it is.  That now has to be relocated somewhere on the drivers side.

I hope the next blog will be more celebratory!

Oh!  I have fitted two new rear wheels and they do look good!  I am also looking at fitting a combined reverse and rear fog light above the number plate – convenient as the plate light is fitted below the number plate!

Don’t know about you but I am looking forward to number 30!

29. Update

Someone (Toby) said more photos and less text  – ok.  This is really to record what I have done in the last couple of weeks – more to do but it really is looking more like a proper car.

Problems juggling the windscreen fitting and the wiper mechanism. First try put the wipers just slightly wrong allowing a gap between the windscreen and body – would have been very draughty.

First time mounting and the column grated on the tunnel. There was a bit to insert between the bracket and column; now fitted and steering is soundless!

Fuel pipe and cap went on ok.  But the IVA requires the cap to be tethered so I still have to create some sort of link inside the cap.  Work in progress…

Can’t afford to get this wrong!  The dials have to be easily seen when seated in the car; the switches either have to be in the exempt zone, or IVA acceptable which creates style issues.  Lower panel is temporary but gives me some control over the wiring and an ability to control from the cockpit before I drill irrevocably.

Not much to say here – water bottle installed!

Boot lid installed perfectly by Ed and Roy, while I played around with other bits.  Difficult job because there are no guides on the lid as to where the hinges go.

So all you have to do is stick bulbs in the lights and away you go.  One hour later having modified the interior of the lampholders to take the bulbs correctly, they worked.  Poor quality units!   (Ignore the number plate – no IVA or re registration yet!   But I needed to see where the number plate lamp went and whether it worked.)

Have very temporarily hung the front onto the car to see how it fits.  It doesn’t! I will need to go carefully in fixing it.  Before that however, I need to do a road test and check the engine over finally as with the front on I wont be able to get to anything.  I have serious concerns as to whether the air filter and alternator will fit under the bonnet.

Other jobs:-

Refit exhaust to take the end back further to the body. Lots of work, then re reading the IVA manual it might not have been necessary!

Checked all necessary bolts to ensure Nyloc nuts on them

Fit quick release steering wheel boss. Problems with bolting the wheel to the boss – one bolt failed and had to use my nutcrackers!

Permanently fixed wiring conduit in boot, conveniently bolted to the mudguard bolts.

That’s it for the moment.  More to come shortly – perhaps when it is less cold as the garage heater is not man enough for these temperatures!


28. New year – new resolution

Happy new year.

My major resolution, along with eating less, giving up chocolate, and taking more exercise, is to finish the car by the end of March.  You can hold me to that!

Progress has been quite good.  Looking at my log of things done, I see that I have carried out a diverse list of odds and ends.  I have acquired – and temporarily fitted a new steering wheel, and have improved the heater cables fitting the lever on the underside of the footwell area.  I have rerun (and heat insulated) cables from the 123 electronic ignition to permanently join the wiring loom; and permanently fitted the cables in the cabin footwell and boot.

Together with Ed and Roy we have fitted permanently the rear mudguards, and the car is now looking more like a car.   I have also trial fitted the windscreen and wipers.

The mudguards have gone on pretty well.  It is a two man (at least) operation as it involves measuring where they should go, drilling a few holes to prove the location, readjusting and finally drilling eight holes around each mudguard and bolting through the body.  A few days later they both came off adgain and we glued the gasket and refitted.  Looks nice!


I have spent my time away from the garage re reading the IVA requirements and reading other kitcar reports dealing with the minutiae of the requirements – important but fiddly.  Consequently the brake lines and cables are all now anchored every 300mm; nyloc nuts have been fitted (and are still to be fitted) to important bolts such as the steering rack/column connection, and the pedal assembly.   Cushioned edging has been fitted in the cockpit where needed, and the page showing the sphere tests in the cabin, printed, laminated hung on the wall, and are already the subject of much poring over.

The requirements for an IVA are odd.  Originally it seems, all that was necessary upon completing the kit car was to pop down to the local DVLA office confirm that it was Radically Altered Vehicle, and confirm that on a totting up process there were sufficient points from using the chassis and engine etc;  the registration would be amended and that was it.  Now, however, the DVSA confirm that in order to go the Radically Altered route would need an IVA.  In fairness, not the full monty, but a Basic IVA.  I confess I have not seen a great difference between the two as most of the requirements still need full testing.  However, and has been recently pointed out to me, the IVA requirements are only for cars less than 10 years old – my Dyane was first registered in 1980 and so is outside of that.  The DVSA response  (presumably seriously) is to have a Voluntary IVA.  Let me leave that hanging, as how does one have a voluntary requirement that is mandatory!  So my decision is to get the car to as full an IVA standard as is possible, present the car, have it failed, and attempt to fix the bits on which it failed.  If I get Dave from Southall who tested the Pembleton (see the first blog) I am hoping he will be as helpful now as he was then!

A word on the IVA requirements.  First off, it seems that a removable steering wheel is permitted.  I have now fitted the alternative steering column and the detachable boss. The wheel looks great and I have more room in which to make a fool of myself as I get out of the car.  It seems that although removal of the wheel is not considered to be immoobilisation, nor is there any requirement for a steering lock – providing that alternatives are available. This means that my concerns about the steering lock and keys hanging down in the non exempt zone, not to mention their proximity to my body, also go away.  What is permitted is a Thatcham Cat 2 immobiliser; I have purchased one and will shortly wire it in.  This together with the ignition switch/key gives the necessary two independent means of immobilisation.   The iginition keyswitch can now be located in the exempt zone behind the wheel.

I then moved on to the windscreen.  Burtons drawings emphasise the need to take careful measurements as per their plan. However, there is some ambiguity!  Burton builders should note that the measurements are taken from the top of the body and not the reveal for the bonnet.  After a lot of remeasuring and fretting I drilled a very small hole in the appropriate place, noting that all dimensions are taken from the RH pre drilled bonnet hinge hole.  I then offered up the windscreen and it looked as though it was in the right ball park.  I bit the bullet and, following the instructions, fitted the screen.

Moving on to the wipers.  I drew out where the holes should be on the top of the tub. Checked and rechecked measurements, and looking at the wiper mechanism could not work out how it could fit in underneath. Furthermore I realised that with the mechanism under there, I would not be able to fit right hand drive instruments behind the steering wheel.  How clever was I in not drilling holes for instruments that would not fit?  Clever? How stupid.!  I was offering the wiper mechanism round the wrong way and reversing it meant that it could all fit in.   However, I did measure the distance between the two wipe axles at 330mm, while the manual was saying drill them at 320mm centres.  I then thought that the distance difference reflected the fact that the axles pointed out at an angle.  I drilled very small holes and then increasingly larger as I got to the required 16mm.  I was still wrong and it took some considerable filing to get to be able to allow the wiper axles to fit.  I had already queried with Burton how it all worked – I could not see how some of it dismantled.  With enormous courtesy Sander at Burton gave me some more details to help – I then found it all in the manual.  Note to self, read, re read and re re read!  The wipers are in.  Photos before dismantling them helped in showing that I had re mantled them slightly wrong and have now corrected that.

So that is it for now.  My To Do list is getting smaller.  I have to fit the fuel filler and the boot lid.  I have to finally decide on switches and their location with the dials. I have to be happy that there is nothing else to do in the engine department before fitting the front of the body.  Oh! and I have noticed that the exhaust pipe sticks out further than it should so I have to go back to the mounts and joins and try to resolve that.

Just noticed that today is January 28th…..end of March is coming up fast!

27. Garage Partying at Xmas

I have been sneaking trips off to the workshop for an hour or so to try to make some more progress.  While the video in Ch 25 shows that the car is vaguely drive-able, the effort in doing so without a foot-brake, accelerator pedal set too high, choke not controllable, and the starter and ignition on a board just out of reach of the cockpit, meant that more jobs need to be completed.

I started with the brakes.  Having discovered that Roy had done an amazing job in cleaning out the old master cylinder reservoir, I was able to jam it back into the cylinder and fill it up with brake fluid – LHM of course – and then found the “one man” bleeding kit I had purchased some many months before for this very purpose.

Following the instructions, I connected it all up to the front tyre as it is intended to pressurise the system in this manner.  Result, brake fluid everywhere as it forced itself out of the top of the reservoir.  Off I trotted to the back brake to release the bleed valve and tried again; still leaking.  I then read somewhere that this system was not necessarily suitable for the 2cv brakes.  So I resorted to the “one man” method of poking the brake pedal with a long bit of wood; this was perfected when we were bleeding the Pembleton brakes (Chapter 1 if you haven’t read about the first 2cv encounter).  Amazingly, I had some pressure in the pedal and going round the car bleeding the system seems to have pressurised it enough that the pedal does not need to be pumped. Not sure of the theory here but the proof will be when I take the car out to test the brakes.

Next to be done was the accelerator cable because the old, cut down, cable was now too short!  So I have reverted to the idea of using a Shimano brake cable which is now installed and other than needing a bit more trimming looks like it will work; the improved “slipperiness” inside the Bowden cable means that the cable can run round sharper corners without sticking.   I have also purchased direct from Burton a choke cable which is installed at the carb end.  I am still thinking about  where the knob should go – Burton style on the dash, or Callum style on the gear lever support.

20161224_125014

This photo shows the present mess of wiring and cables from which very shortly order will come from the chaos.

Next the wiring loom.  I spent a long time reviewing photos I took when I went to Burton to see how much of the loom has to come through to the engine compartment, and drilled through the body to allow it to come through in the correct part of the engine compartment.  Being a LHD loom in a RHD tub gives a few more problems – lights and indicators will no doubt be reversed, and I needed to remove the fan to rerun the 123 wiring out to the side where the loom now runs.  I will now fix the loom inside the dash and make whatever connections I can make and then test the electrics.  I miss not having a wiring diagram and therefore hope that I will have made the correct connections and not run the risk of burning everything out.

If everything checks out we will need to consider the layout of the instruments before drilling all the holes.  I favour one of the Burton layouts as in the pictures.

img_20160520_123209img_20160520_113943

Still to come – petrol does not seem to be getting through from the tank to the pump and the engine only starts with a direct injection into the carb. To be investigated.

Also, looking at the video the tub is still pretty ugly and needs the rear wings to be fitted and then the front ones.  I can then complete the wiring in the engine compartment.

Work done 2016 to date:

Mar 2016 x fill both front drive shafts with grease

Apr 2016 x Cobra Seats http://www.cobraseats.com/ re head restraints
Apr 2016 x fit chassis/body lugs
Apr 2016 x fit body adhesive strip (initially to body only
Apr 2016 x Fit Burton exhaust - look for s/s strips in Burton bags
Apr 2016 x Fix wiring loom in body and follow manual for finalising body

Sep 2016 x Fire up engine
Sep 2016 x cowling off to investigate oil leak
Sep 2016 x how does fan belt connect 

Nov 2016 x find battery securing bar and drill hole for bolt (fits at the base of battery)
Nov 2016 x fit new gaiter to o/s middle of drive shaft
Nov 2016 x Connect clutch - but after body fitted
Nov 2016 x look for Burton loom separate bit.
Nov 2016 x check what hoses I have/need for heating and ventilation
Nov 2016 x Torque bolts for: gearbox mounts
Nov 2016 x fit gear lever bracket to body 
Nov 2016 x fit steering column and articulated joint
Nov 2016 x fix gearlever support to floor of chassis
Nov 2016 x investigate 12v socket to fit in n/s ex steering hole on dashboard
Nov 2016 x Put 2cv battery on charge in garage
Nov 2016 x look at filter for carburettor and see if it adapts to match burton photo - with power tube
Nov 2016 x refit rear 123 covering
Nov 2016 x replace fan cowling eventually to take powertube
Nov 2016 x fit new reflinard

Dec 2016 x master cylinder - front connection to rear brakes, middle connection to other side of gearbox caliper
Dec 2016 x white wire attached to battery negative to connect to screwed battery holder
Dec 2016 x Clean master cylinder 
Dec 2016 x Fit Master cylinder reservoir
Dec 2016 x buy burton choke cable
Dec 2016 x work out how steering lock works
Dec 2016 x change rocker cover gaskets
Dec 2016 x Locate engine compartment on wiring loom and connect relevant bits
Dec 2016 x Tidy up fuel supply to pump and onto carburetor
Dec 2016 x Find heater control for inside car
Dec 2016 x check if new oil leak (onto chassis!) - new rocker cover gaskets need fitting
Dec 2016 x drill body to connect accelerator
Dec 2016 x Fit connecting pipe between calipers
Dec 2016 x Fix air filter 
Dec 2016 x Fit runners for seats
Dec 2016 x fitted heater control
Dec 2016 x fitted temp connection to ignition switch
Dec 2016 x fitted temporary connection to x6 in engine compartment
Dec 2016 x drill hole to brace battery tray
Dec 2016 x connect cable to oil sensor (behind) fuel pump - Block 6 wire 87
Dec 2016 x two more body to chassis bolts in the boot!
Dec 2016 x run 123 wires up and to rhs (maybe!! - check rest of wiring loom for connection) - no LHS
Dec 2016 x look at bulkhead end of existing acc cable and determine fixing
Dec 2016 x fit remainder of handbrake bolts
Dec 2016 x replace oil feeds from block to heads

26. Onwards….

Just to list the latest problems, solutions, and consequences as a result of driving the car under its own steam.

Accelerator pedal.  Outer cable has now been shortened to allow for the pedal to drop to the correct and usable height on the pedal assembly, with fine adjustment now available at the carb end.  A consequence of the reworked pedal and its location in a RHD tub is that the pedal has a tendency to lift up too high and needs fancy footwork to drop back to a correct level.  Maybe some retaining spring might solve that – to be considered later.

Clutch cable. Still needs adjustment as the biting point is too low – as demonstrated  to me, when the car was driven.

Seats.  After fitting the triangulated frame into the car to provide runners for the seats and support for the seat belts, we fitted the drivers seat in, slid it back to a comfortable (?) position – and there it stuck, immovable.  Some swearing, frame out and seat dislodged on the runners to provide access to the bolts and it was obvious that the lever to adjust the seat was fouling on a cross rail; phone calls to Cobra Seats produced some spacers which raise the front of the seat sufficiently to allow the lever to work properly.  Reassembly of the frame – most of the clips through which the body is screwed to the chassis, popped out and distributed themselves on the floor.   Much hard work in getting them and the frame bolted back.

Steering column.  I had speed read the manual again and just remembered the single line that read “Put the top part of the column through the dashboard from the outside”.   Ah! I had previously inserted it from the inside.  Seat frame out again, body separated from the chassis to allow it to move backwards and release the steering column.  Refit the frame and body to the chassis!  Attempt to insert column and realise that the steering lock welded to the steering column cannot go through the hole in the dash from the outside!   Head scratching and a telephone call to Sander at Burton obtained the answer “put it in from behind the dashboard”.   Streams of tears as I realised the body would have to come off again.  Ed says “Lets try to force it in by relying on the flexibility of the dash board”.  Back into the footwell I go upside down, undo the universal joint and in pulling it down realise that the inner rod of the column, not only turns but also goes up and down.  Problem solved!  No need to remove body again; quick tap on the end of the column returns the inner rod to fit back into the UJ, and Uncle Robert returns to the family!  I assume that there is a ball race in the column that, either deliberately or not, provides the longitudinal flexibility!

Space in cockpit.  Having put the seat in and with the steering wheel back on I manoeuvre myself into a driving position.  Tight!  Awkward with the pedal arrangement and I may need (despite being nearly 6 foot) to bring the pedals back by using the adjustment on the assembly; we will see.   Other problems to present themselves before being sent away for being insolent – how does one get into the car with the hood up; how does one put the hood up from within the car?  To be solved at a later date!

Associated with this problem of space – a  removable steering wheel would be a great asset.  It is an option that Burton offer but they say it is not suitable for the UK test.  I think it would be a great advantage and might also do away with the need for a steering lock which would allow the correct steering column assembly.  The internet is full of comment about this topic but none of it particularly helpful.  Certainly, the removal or disconnection of an airbag to facilitate the mounting of a new steering wheel makes it illegal – although obviously a 1980 Dyane didn’t have that as original equipment. An email to Mota Lita, the suppliers of the Burton steering wheel,  has not helped, and so I am waiting on a reply from the DVSA for the definitive response.

Brake line connections to the master cylinder next, and to see whether the original is working properly.  I will then be able to drive out of the garage and not have to rely on the handbrake to stop!

Oil leak noticed from the nearside pot where the pushrods go through to the block. Needs more investigation – I knew I should have stripped and rebuilt the engine before installation onto the body – another “we will see”…

Oh, and Father Christmas?  I appeared at Janes RDA group and handed out the presents – the look on the kids faces was fantastic  🙂

kn-father-christmas

Merry Christmas to all my readers  and a happy New Year.   See you next year.


25. It’s taken a long time to get here…..

I think, this time, just the video!!

Another time for pictures of me as Father Christmas; of the day that Ed and I spent in dismantling the body from the chassis in order to put the steering column in according to the manual – and reassembling and realising it didn’t work; of my numerous phone calls to identify whether a detachable steering wheel is both legal and qualifies as an immobilisation device……

Just enjoy our moment  🙂

https://youtu.be/X-Ip7pooTAU


24. Three score years and ten

20161111_153446

So that’s it – I have my biblical allotment of time and anything else I do is obviously now on borrowed time!  Actually, that is not the case and, I feel pretty fit and well; get a bit bemused when the guy in Budgens takes the change from my hand and counts out the correct money, and when young women offer me their seat on the Tube,  but they obviously and sadly have poor eyesight.

The reason for me raising this is that I have spent quite a lot of time celebrating my birthday and not quite so much time on the car.  Furthermore, the latest jobs have involved me in going head first into the footwell and fiddling around, and I realise that I am not quite as flexible as I thought.  That, and the quizzical look and enquiry from Ed – ” are you ok – would you like me to do it?

20161128_09564620161128_155918

So, the work done since my last blog has included obtaining and fitting new hoses, air filter (new brackets because the Dyane locates the air filter in a different place), fiddle-arsing around with the heater cables and still not satisfactorily being able to get the control wire to work, and bits of tidying up in the engine compartment.  It is getting crowded in there now and I haven’t fitted the heater hoses yet.,

I have also tidied up the garage as I was beginning to lose tools and would spend many minutes walking round looking for them.  Sadly, the garage tidiness has deteriorated again – but it will be done this week!

But the big news is that among my presents were a flying helmet from Roy and a set of open end and ratchet ring spanners from Ed. Both very welcome for their specific purposes.

Actually the really big news is that the clutch cable has been connected and seems to disengage the clutch!  I have to admit to it being several clutch cables later.  I was conscious that I was fixing a RHD clutch cable/pedal to a non standard Burton body.  I measured my original Dyane cable and then the supplied Burton cable.  80 and 72 cms length respectively. Trying to fit it on my own (raising the body on the lift, crawling under to access the fork, lowering the body to crawl in to the footwell to try to connect the cable, crawling out again and raising the body again….  (repeat do..next loop ad infinitum) …I emailed Callum.

He said use the original Dyane cable, but I found it was too long. After much puzzling about the mechanics of outer and inner Bowden cables I decided to get it shortened to 76cms.  A week later I got the cable back from clutch specialists in Dorking,  duly shortened with a new terminal end fitted.  Too short!!

At that point Ed was able to spend time with me and we tried again with the shorter Burton cable and for some reason it fitted perfectly.  Success – some adjustment still needed at the point where the cable comes out from the pedal – but a result, and in a fraction of the time I had previously spent;   thank you Ed!

As I want to be able to test the clutch and the engine and sit inside the car to be able to move it, I needed the accelerator cable to be fitted.  The Burton supplied one was seriously too short; it is designed for a LHD body and a very direct line from the pedal to the carb., although it also has a non standard (and easier) fitting at the pedal end. However, the original Dyane cable was the one that looked more sensible, but how to make the connection through the bulkhead.

20161122_14282320161128_095623

Callum supplied the answer for that both in correspondence, and in one of the 2CV Special bulletin board messages http://www.citroenspecialsclub.org/forum/ and my large packet of mudguard washers and Dremel came in handy.  After much experimentation I found the best way was to drill a hole in the bulkhead to coincide with the (modified position of the ) pedal and then cover it with a washer drilled to take bolts; and then fit a further washer with a gap created by nuts and drilled to take the “push in” 2cv type spring loaded holder.  After some considerable fiddling to get the correct dimensions, I fitted it.  Result – except the cable was too tight and the pedal wedged at the top of the footwell.  After some reduction of the outer cable and refitting at the carb end, it all seems to work and the accelerator pedal now seems to be at the correct height.

I still have no hydraulics for the brakes and that will be the next job, after I have proved all my efforts by moving the car under its own steam.  I still need to be certain that the oil leaks have now been fixed and that the fan spins well in the housing and, of course that the clutch and accelerator settings are correct.  The brakes will determine whether or not I need to replace the master cylinder, and if so it will need a monumental effort in the footwell again!  Defibrillator will be close by and available in case of problems 🙂

Only then can I consider bolting down the body permanently with the seat frame and adjust the steering column to ensure that the slight movements do not cause it to bind on the body.  (If it does, I need to move the dashboard hole along slightly and for this reason the column has not yet been bolted to the dashboard).

But these jobs are for a later date.  First off, all my work to date needs to be proved. Only then can I consider the remainder of the body work.

Finished by Christmas?  I don’t think so!

23. Maybe not so cool!

Back from sailing – great trip, thank you for asking!  The Adriatic Sea is a fantastic sailing ground and while there were one or two problems with the boat (me standing in 3 inches of water in the heads with no drainage and ever increasingly smelly!) we had a fabulous time.

20160912_185511

Back on terra firma and it is back to the Burton.  We left it running sweetly, but having thrown out a lot of oil, the oil cooler and the oil feeder lines have had to be replaced.   The gaiter on the drive shaft also needed to be replaced; long time to do as feeding the gaiter over the drive shaft just would not work until I used two screwdrivers and used my pushbike wheel innertube changing technique!  Some work in the footwell screwing down handbrake and gear lever has followed.

Then replacement of the cooling system. The old cowling came out fairly cleanly but left me scratching my head as to how to put it all back together again.  Thank you internet! – a source suggested that the best thing to do is to jack up under the engine block and the engine mounts separate from the block and putting the cowling back in is easy.

The real problem came in replacing the backplate which 2CVers will know sits behind the oil cooler and in front of the back of the cowling.  The new oil cooler, proudly sat, rampant on the front of the block was very obviously in the wrong place.  Several hours later, much swearing and bruised fingers, and reforming the pipes on the cooler and I was able to put it all back with the backplates, cooler, cowling and fan and fanbelt all in place.

20160921_180438

And that is how it rests until I am back from France.  I am planning to replace the air filter in the 2CV position rather than the Dyane offset, and have ordered new brackets and hoses.  I have also been sizing up how the Powertube will fit onto the new cowling. I will need to drill a large hole on the top of the cowling but will wait until I can place it accurately.

I cannot bring myself to start the engine again.  I am convinced that the oil feeder pipes and the oil cooler will have fractured again – and I can’t face taking it all apart once more if the oil starts spraying out again.  So the testing of all the cooling system – oil and air – will have to wait until I am back and rested and able to face any problems again.

It will be downhill all the way from here…..


22. Actually working !!

The reason for its poor starting is that I forgot to use the choke!  Once the flooding had eased and I got the correct balance of throttle and choke, it started and ran quite sweetly.    What you can’t see from the video is the oil coming out from what turned out to be a fractured pipe into the oil cooler.

How clever was I in not yet fitting the new cowling (which hasn’t arrived yet!)  to enable me to replace the oil cooler (when that arrives) as well as the oil feeder pipes.

I am thinking I have been somewhat less clever, in not running the engine on the bench much earlier and finding the oil leaks then.  Note to other builders – I think this would have been a good idea!

“Oh look” says Ed.  “You have not changed the old gaiter on the drive shaft”.   “Yes I have” I replied – but it does look very torn.  I think the suspension has been too loose on that side and when we have been turning the road wheel when up in the air, it has rubbed against the chassis.  New gaiter ordered from ECAS and the drive shaft off for gaiter replacement.  Here as around other bits of the car I am beginning to feel I know my way around this a bit better now.  Who knows I might get myself a permanent job as a Citroen mechanic/engineer!

Meanwhile, the body has been screwed down with the Burton trims and we have played around with the seat/seat belt anchorage system.  Ed and I scratched our heads a bit as we puzzled out how to fit the seatbelts.  It seems that the lap and diagonal belts are to be fitted a**e about face, as the only sensible anchorage for the vertical is in the centre of the frame at the top.  Before that gets fitted permanently I need to be able to get upside down again inside the footwell to finalise the clutch and accelerator cable fittings and finally screw the handbrake securely to the body. The remaining fitting of the steering column really needs to be left until the body is in its final place on the chassis.  A few bits more in finishing off the engine compartment (heater tubes, wiring, heat exchanger cables etc) and I think we will turn our thoughts and actions to fitting the rear wings and boot lid.

Quick update;  a few days later – new oil cooler fitted.  No real problem except you must check for the old rubber grommets still in the hole in the block – removed – then having to very carefully bend the pipes so that it fits properly.   Engine started again and, Hey, no obvious oil leaks, so when the new fan cover arrives, it can be fitted permanently.

New gaiter fitted – really hard work in putting the new gaiter on; remove inner drive shaft from the disk, separate inner and outer shafts and slide new gaiter on to shaft.  Hard work with a slippery greasy shaft and gaiter in trying to push it into place, but 45 minutes later, all done!   Retired for lunch and afternoon with my feet up.  🙂

I am off sailing in a week and then back for a trip to France with Jane and Millie so it looks like very little further work until mid October.   See you then, but in the meantime feel free to comment as you wish – I will be keeping an eye on any responses .


21. Workin’ workin’ workin’!

Solved the oil leak – wasn’t the cooler, but the oil feed from the block to the RHS “pot”.   A call to ECAS ordered a new flexible hose replacement, and at the same time I ordered a new Reniflard (“breather”  to the English speaking nations) and, what I thought at the time was brilliant, a fuel pump primer.  The fuel primer may not have been such a good idea – we will see when I install it.

IMG_20160823_152007

old pipe that split

The breather is now installed with a new gasket, as is the oil feed pipe.  I have yet to test them but I have every expectation that they will work.  The manual says in big capital letters  “DO NOT OVERTIGHTEN”, however it is very difficult to get a torque wrench in there so I have estimated it – as usual with most of the bolts!

IMG_20160830_173022

new flexible pipe

While rummaging around in the original kit that Burton sent me I came across this. Initially I thought it was a tool to fit the bonding between body and chassis (see later) but an email to Burton elicited the response that it was the catch for the boot lid – who knew….?

IMG_20160824_151335

Another issue that has become apparent when converting from LHD tub to RHD is the positioning of the battery tray.  It sits easily on the LHS but the support bracket has nowhere to go because of all the exhaust plumbing.  A new hole drilled in the tray and several drill bits later moved the support to one side and bolted through an existing chassis hole.  The horn then sits neatly under the battery tray horizontally and misses the handbrake mechanism.  We shall see whether the sound output is affected, or indeed if it suffers from rain ingress!

IMG_20160830_173359

Generally the engine and attachments are getting crowded. When I come to fit the hoses it is going to be well cramped and will cause problems with accelerator, choke and heater cables.  Something to look forward to.

Next off, I took the executive decision to tie the body permanently to the chassis.  Up until now I have thought that it would be an easier job to remove the engine without the hindrance of the body,  but with the engine starting and running so well even with the oil leak, I thought it is time to move on.

A word to Burton car builders. The spongy tape that comes with the body as the interface between body and chassis should be put on before the body is mounted.  I didnt! You try being upside down head first in the footwell surrounded by festoons of wires and loose gear levers and handbrake levers, and then leaning on the very section of fibreglass you are trying to lift to insert the tape,  I lost kilos working on it.  A further tip? Place the “J” chassis clips on the chassis before mounting the body as the same problem applies trying to do it retrospectively.

The body is now mounted, and I can permanently fix the steering wheel, handbrake and gearlever and support. Progress. The manual does try to confirm that the body needs to be slightly off centre to accommodate the alternator and the bonnet.  Indeed I have read elsewhere that the shortest possible fan belt is also necessary for the same reason.  I reckon I do have a few mm to play with if necessary, but if I do need to move the body, I will also need to move the steering column over to prevent it from hitting the tunnel. I will not drill any holes to fix until I am happy with the overall positioning.

In order to fit a PowerTube recommended by Burton for an extra few bhp (obviously much needed) my fan cowling does not work as it is designed for a Dyane and the 2CV is different.  Burton builders beware the differences generally between 2CV, Dyane and all the other derivatives. Take advice as to what can be used and what not.  Anyway I have ordered a replacement from Classic 2CV recycling and I hope that will do the trick. (I must check that it also has the disc cooling tubes as well…  email to Martyn Wilson at Classic 2cv recycling)

I now have to fit the various cables.  Much discussion on the internet about the accelerator cable which now has a more tortuous route to get to the pedal on a RHD car. Someone suggested using a Shimano bike teflon coated tube and cable which I duly ordered…. I am probably thick but cannot get the cable into the tube so I may need some other ideas, particularly as the exit from the pedal puts the cable very high on the bulkhead.

So that’s where we are at the moment – more workin! next week.

By way of aside and to counter any view that I might know what I am doing at any time I have shown here a photo of me somewhat wet after a days trip on the river.  I trust Ed is not reading this as he already has a somewhat dubious view of my marine activities, although having had a day on the river with him on his narrowboat, I am not sure I gave any clues then.  But today…..

A quiet day at Harleyford, preparing to take the boat out for the first time since its delivery.    No excuses….. untying; boat drifts; I hang on with hands on pontoon and feet on boat; boat drifts further……  I am sure you can imagine.  Anyone who said I was so laid back that I was almost horizontal would have seen that enacted just before I went vertical again – in the river    🙂

The photos show me in a state of undress after the marina shop confirmed they had no clothes in stock.   Phone caput, wallet soaking, feet squelchy …. but it was very funny, except Millie seemed a bit frightened for a short while.

All ok – nightmare journey on M4 with coach passengers and lorry drivers looking down…  and I shudder to think what the neighbours think as I got out of the car at home.

everything soaked...

everything soaked…

That’s all for the moment – will report soon on next bit of progress


20. Moving on, and backwards!

Over two months since the last blog!  Apologies if anyone is bothered that I have not been around and written anything.  Hoiidays and other things have got in the way. Besides the car I have been looking after myself – I have had a cardioversion (look it up) and Jane and I have both been looking after Millie who has had her own medical issues with being speyed!    In addition, in fulfilment of my Parish Councillor duties, I have been involved in finalising the arrangements for a Skateboard Park in East Horsley. Works are under way and it will be open at the beginning of September.

But enough of that; on to matters associated with the car.  Progress has been slow because I haven’t been to the garage much.  However, on those occasions I was there I have been adding bits and pieces (cowling for cooling) and generally tightening things up. Then I realised that I had not put the cowling round the front discs.  Acknowledging the myriad of comments relating to the need to cool the front brakes, particularly down hills, I decided that I couldn’t leave them off.

I also realised that there would be need for undoing quite a bit of that which I had already done up!  All of the cowling would need to come off again, the crossbox would need to be dropped – and of course, there would be more bits to be purchased from Ecas; the old cowlings painted up quite well, but they were missing brackets and nuts and bolts.

I decided that as I needed to get under the car, I would purchase a “lift”.  After some research I decided on this   http://www.ebay.co.uk/itm/CAR-TILTER-TILTING-CAR-LIFT-CAR-ROLLER-ADJUSTABLE-RAMP-3-IN-1-CJAUTOS-CL01-/331871588753. I have to say it is excellent and gave me a safe and reasonable working height to get under the chassis as necessary.

While the body was on but not fixed, I took the opportunity of lining up the Burton steering column.  This comes in two parts secured in the middle by a universal joint and presumably designed to collapse in the event of an accident; an improvement on the Citroen which has a fixed column from steering rack to steering wheel.  I fretted about being able to fix the two parts together given the restricted length between dashboard and chassis, but see later, it worked.

The body then came off and I had a go at getting the wiring loom permanently in place. We shall see if it does work permanently, but for the time being it is holding.  More tightening up of chassis items together with  suspension,  exhaust, axles etc and all torqued to manufacturers spec. then took me to a point where it was time to put the body on in its permanent position.  I have been warned previously by Burton and by Callum that the body needs to be slightly offset to accommodate the air filter under the bonnet.  So my present theory is to leave the body unfixed but to make all the necessary connections – wiring, handbrake,  gear lever,  and brakes.

When Roy came over to help we managed to fit the steering by me being down by the pedals and he lifting and pulling slightly back the body to allow the column to be connected and fitted behind the dashboard.

Now that the body is in place, and the engine accessories fitted, “lets start it up” we said!  Although we put fuel in the tank and cranked it over it proved to be too much for the pump, probably because of insufficient head.  So we poured some petrol directly into the carburetor.  It fired and ran – really well, smoothly and the Burton exhaust burbled nicely; Roy saying how well the engine was running……… then there was a bang!

Switched the engine off as loads of oil sprayed out everywhere!

We suspect it may be the oil cooler that has gone so it is back to taking the fan and cowling off again and investigating – and that is where we are at the moment.

More next time once we have investigated fully, but still a sense of achievement that the engine did fire and run!

19. Back online – if not on time

Gosh. Having a puppy takes up a lot of time; just like having a baby!   However, I can now report that Millie sleeps through the night, is clean and dry most of the time, and just the most adorable looking dog (just don’t tell her, she already knows).  Training as a mechanic will begin soon.

Quite a lot has happened since the last blog, including another trip to Zutphen and the Burton factory.

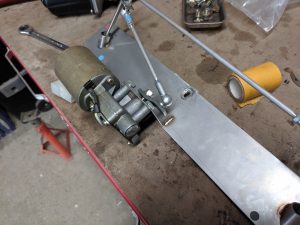
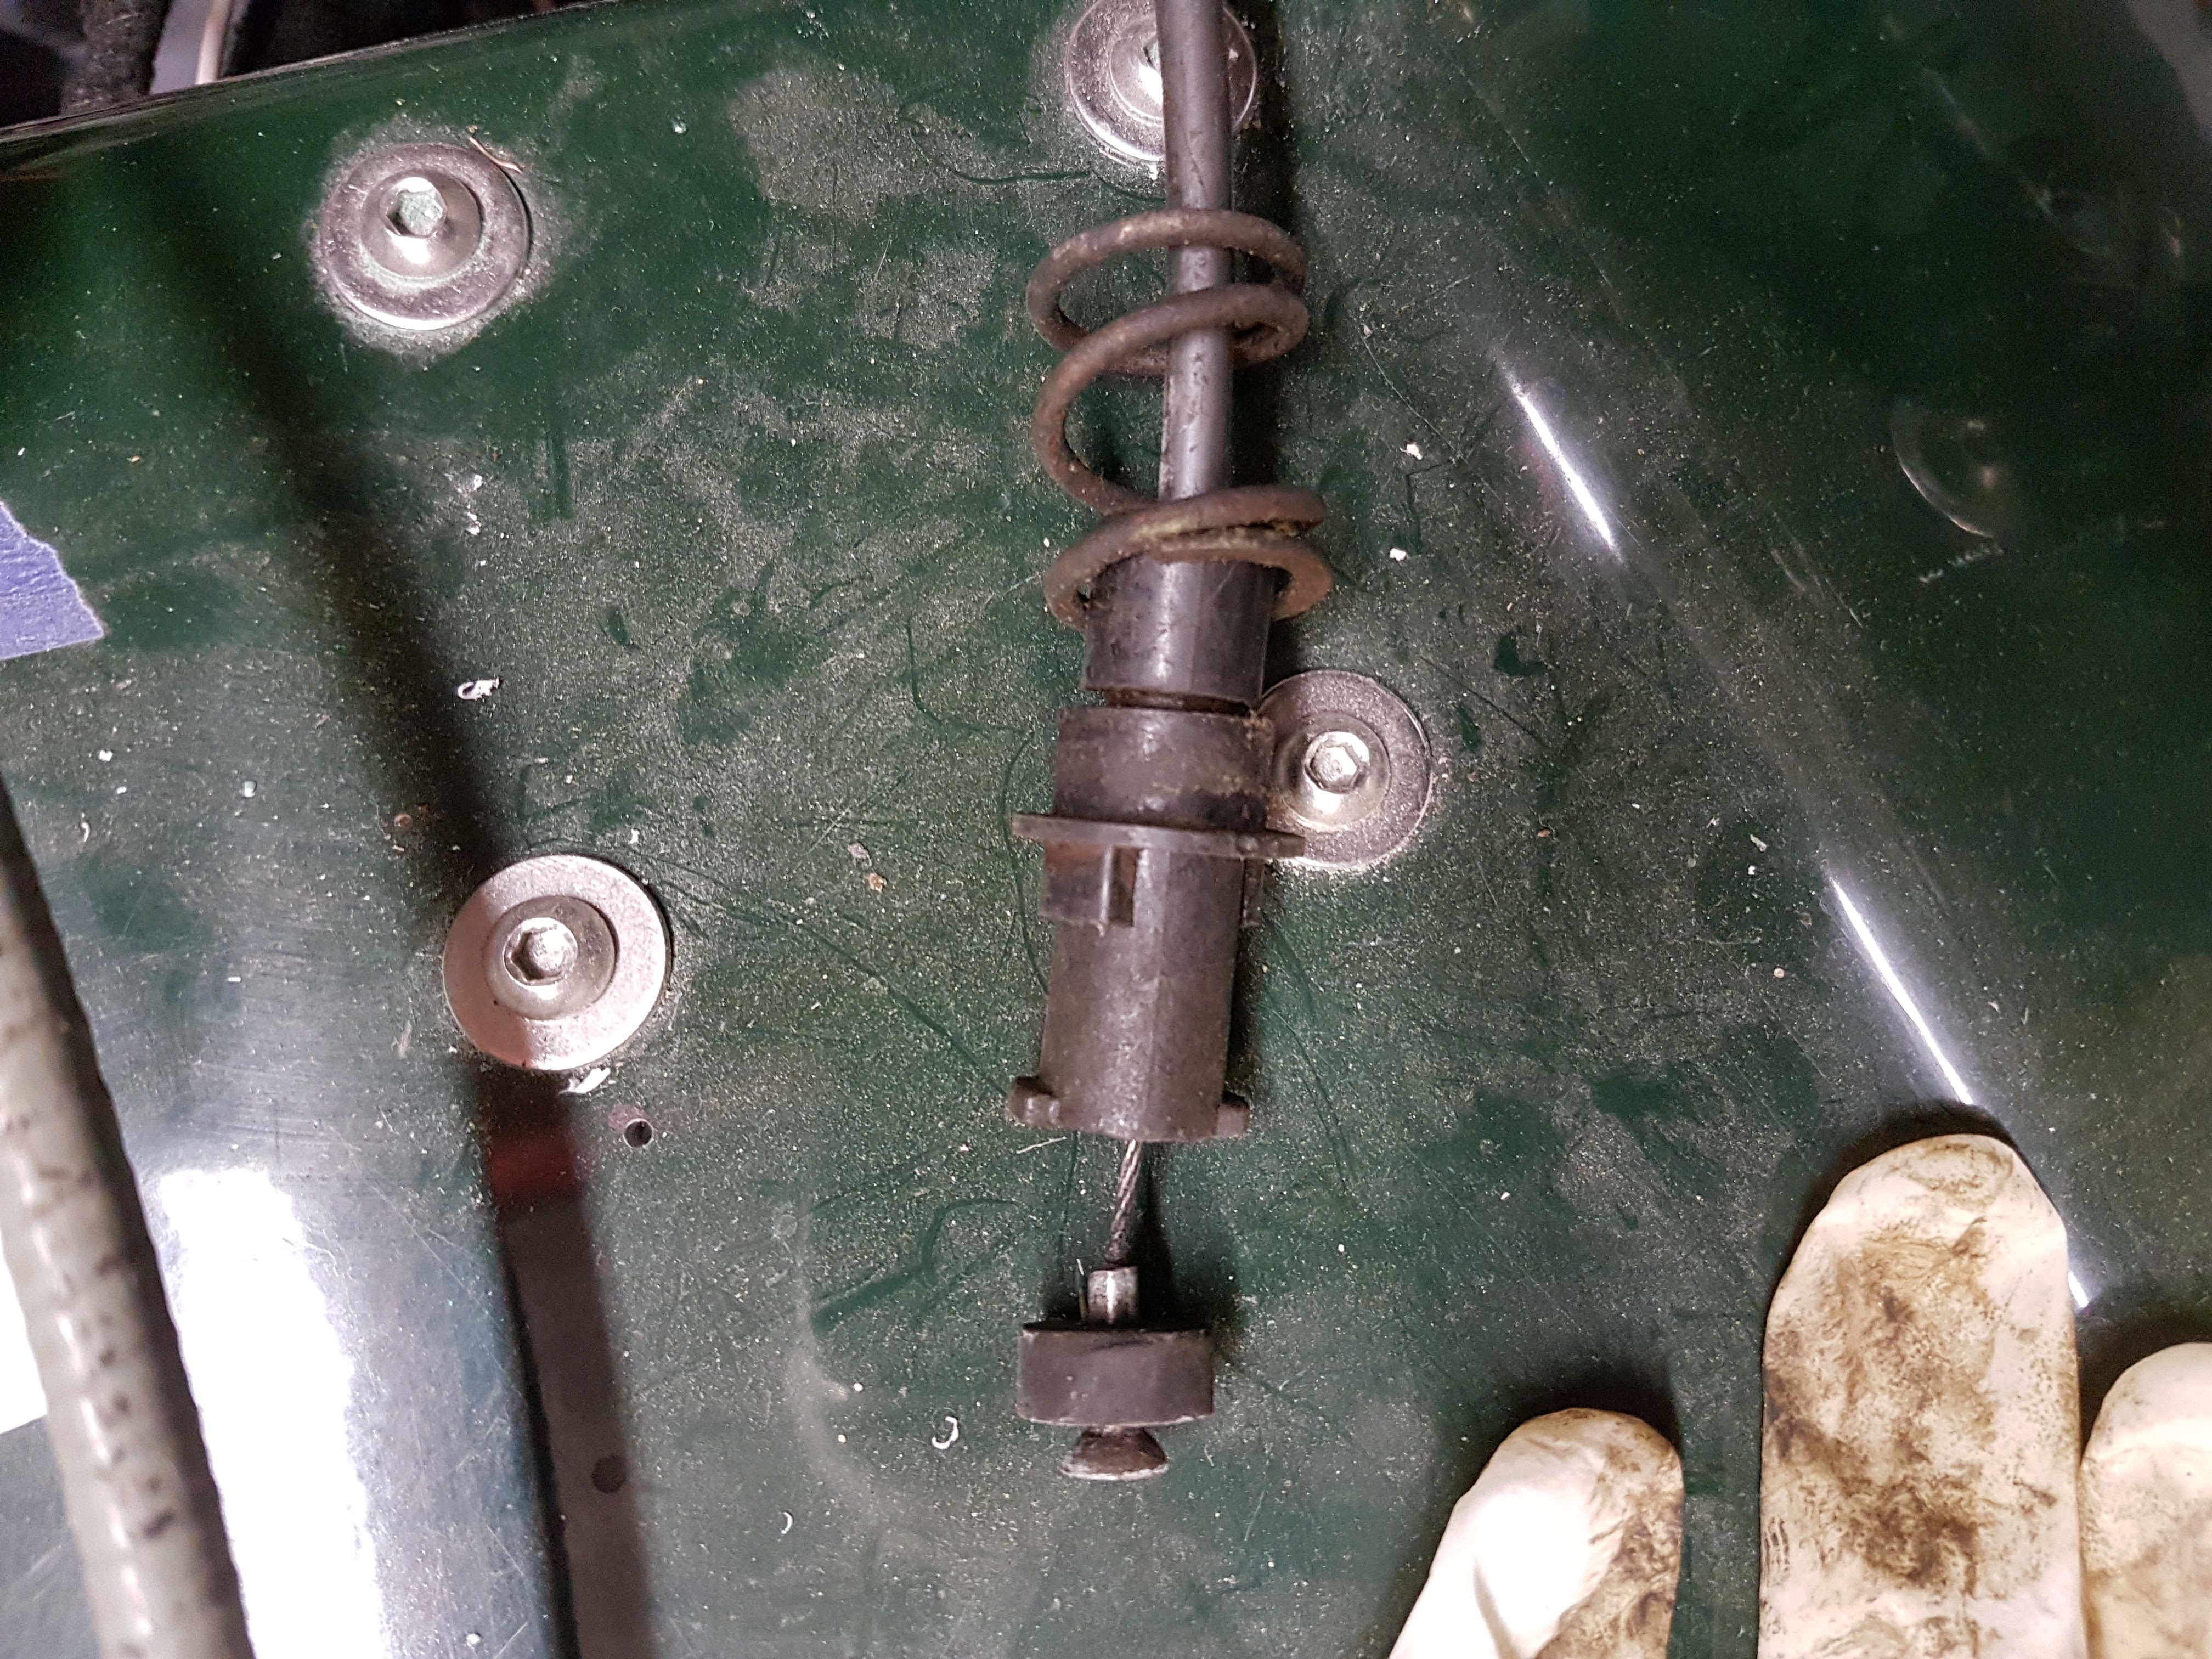
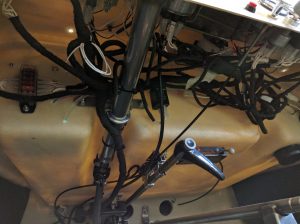
First off, the pedal assembly has been put together and secured in the car.  A trip to the local foundry was necessary to have the accelerator pedal bent to a new shape to fit the, slightly restricted, area tucked over to the right of the footwell.  This involved bending the upper part of the pedal arm over to the right to avoid the moulding, and then the lower part bent up to enable (what I hope will be) a full range of pedal travel. Until the body is mounted and the cables connected, I won’t be certain that it will work.  I do hope it will, as changing and refitting the pedal assembly will be a real pain.

Along the way, the seats turned up from Cobra.  They had converted the original seats (without headrests) to ones with detachable headrests.  A really good result, the seats look comfortable, and as far as any BIVA should be appropriate.  Thank you Cobra for a great job.

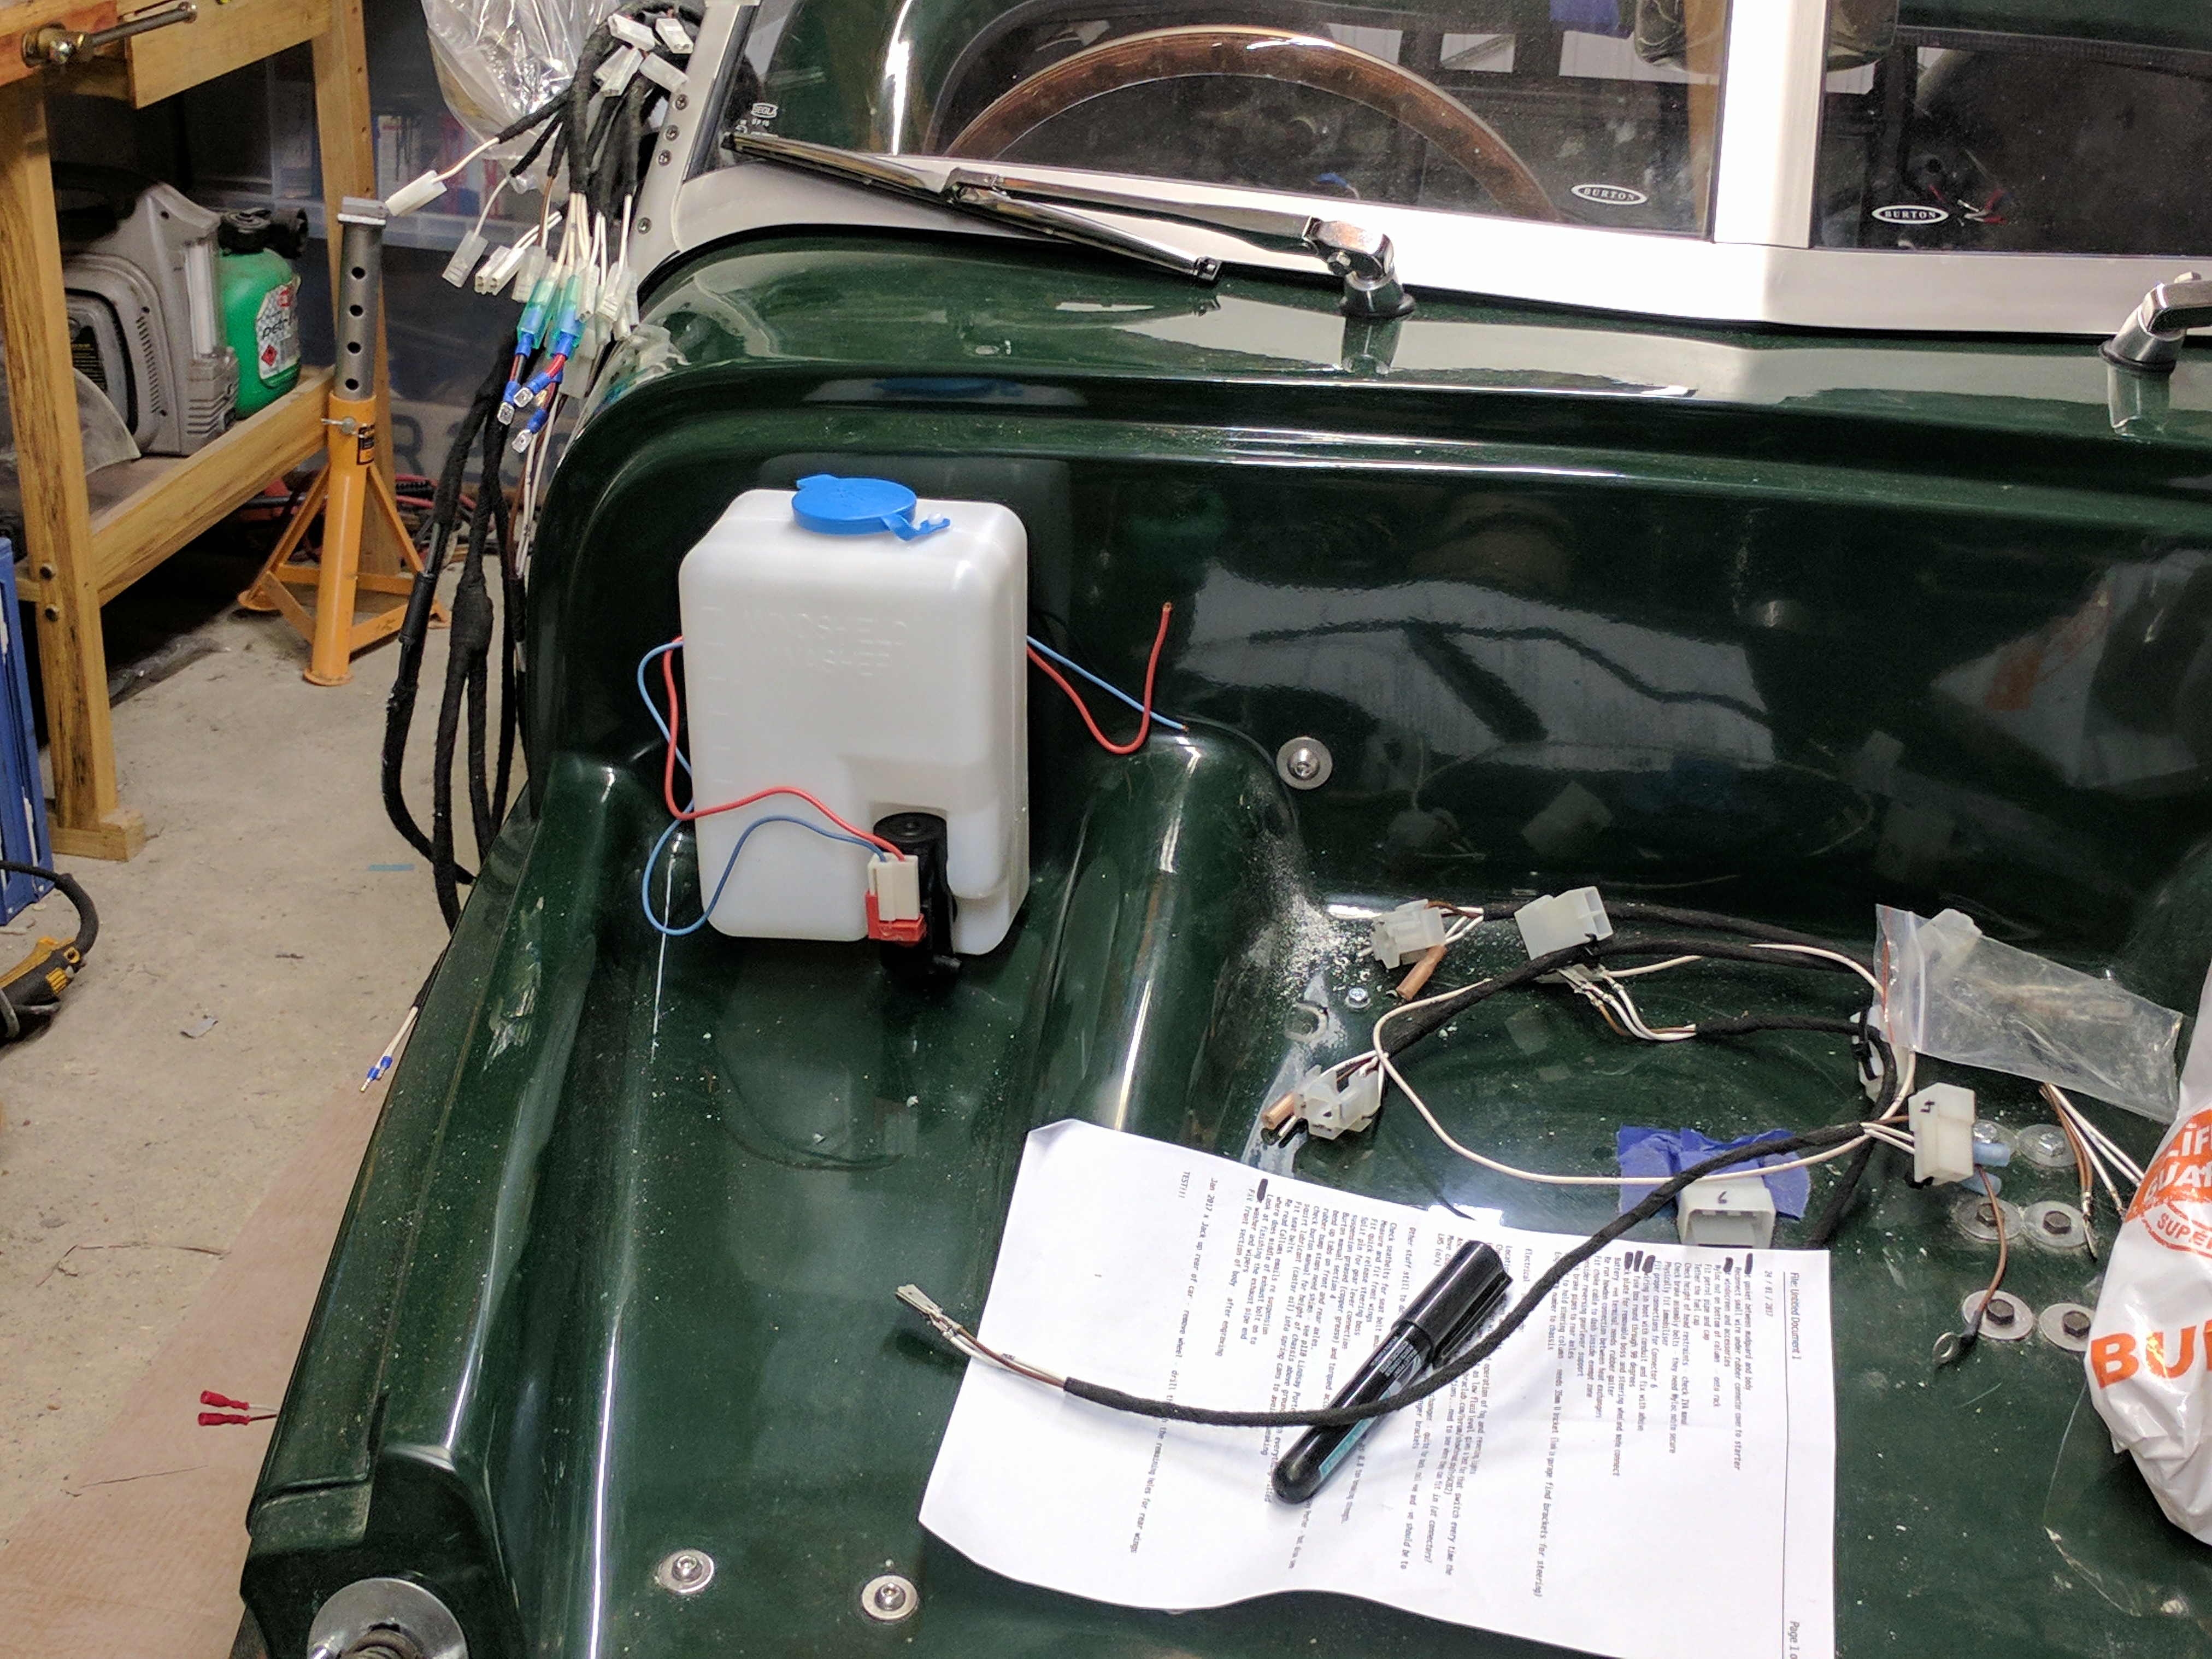
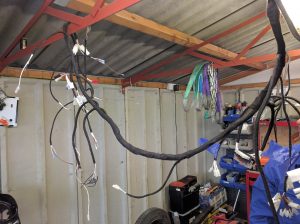
We decided that the wiring loom was the next important item to fix (as does the build manual) and we duly unwrapped it and stretched it along the length of the car, trying to identify what bits went where.  Everything was numbered and it should all be easy!  Ed and I drew up a spreadsheet to identify the numbered cables in order from back to front of car; and then in numerical order because it was easier to check what wires did what in order to locate them.  Pretty impossible and the discussion turned to which side the loom should go and which holes it should use.   After trying to lay the loom, first in the car, and then from the rafters, we decided that it might be best for Burton to decide!

IMG_20160510_133219

A list was made of specific queries and plans laid to go to Holland.  “Lets go after the Laon (northern France) rally”  we said.    “We can zip up, stay overnight and then get back, just adding a day to the Laon long weekend.”  Unfortunately, logistics could not be worked out and the idea abandoned.  In the event I flew to Holland a week later and drove to the factory in a very small Kia.  What a great car!  Four door, nippy, quiet, and economic.   (Is this review good enough for Top Gear?)

At the factory, I went into the workshop and with the help of their senior mechanic (I’m sorry, I can’t remember your name but who appears in the Burton videos), was able to take lots of photos of their cars in varying stages of build.  Wires and orifices and fuel and steering and handbrake locations and fixings all went into the camera for future analysis.   Incredibly useful.  We also decided that the wiring loom was best run on the opposite side (ie right hand side for RHD)  simply changing a few connections to avoid the left indicators flashing when the right hand switch was operated!  A new regulator was suggested to replace the original electro mechanical one that I was planning to refit, as the old type becomes unstable from the heat of the engine compartment and allows delivery of too high a voltage back to the battery!

IMG_20160520_113800

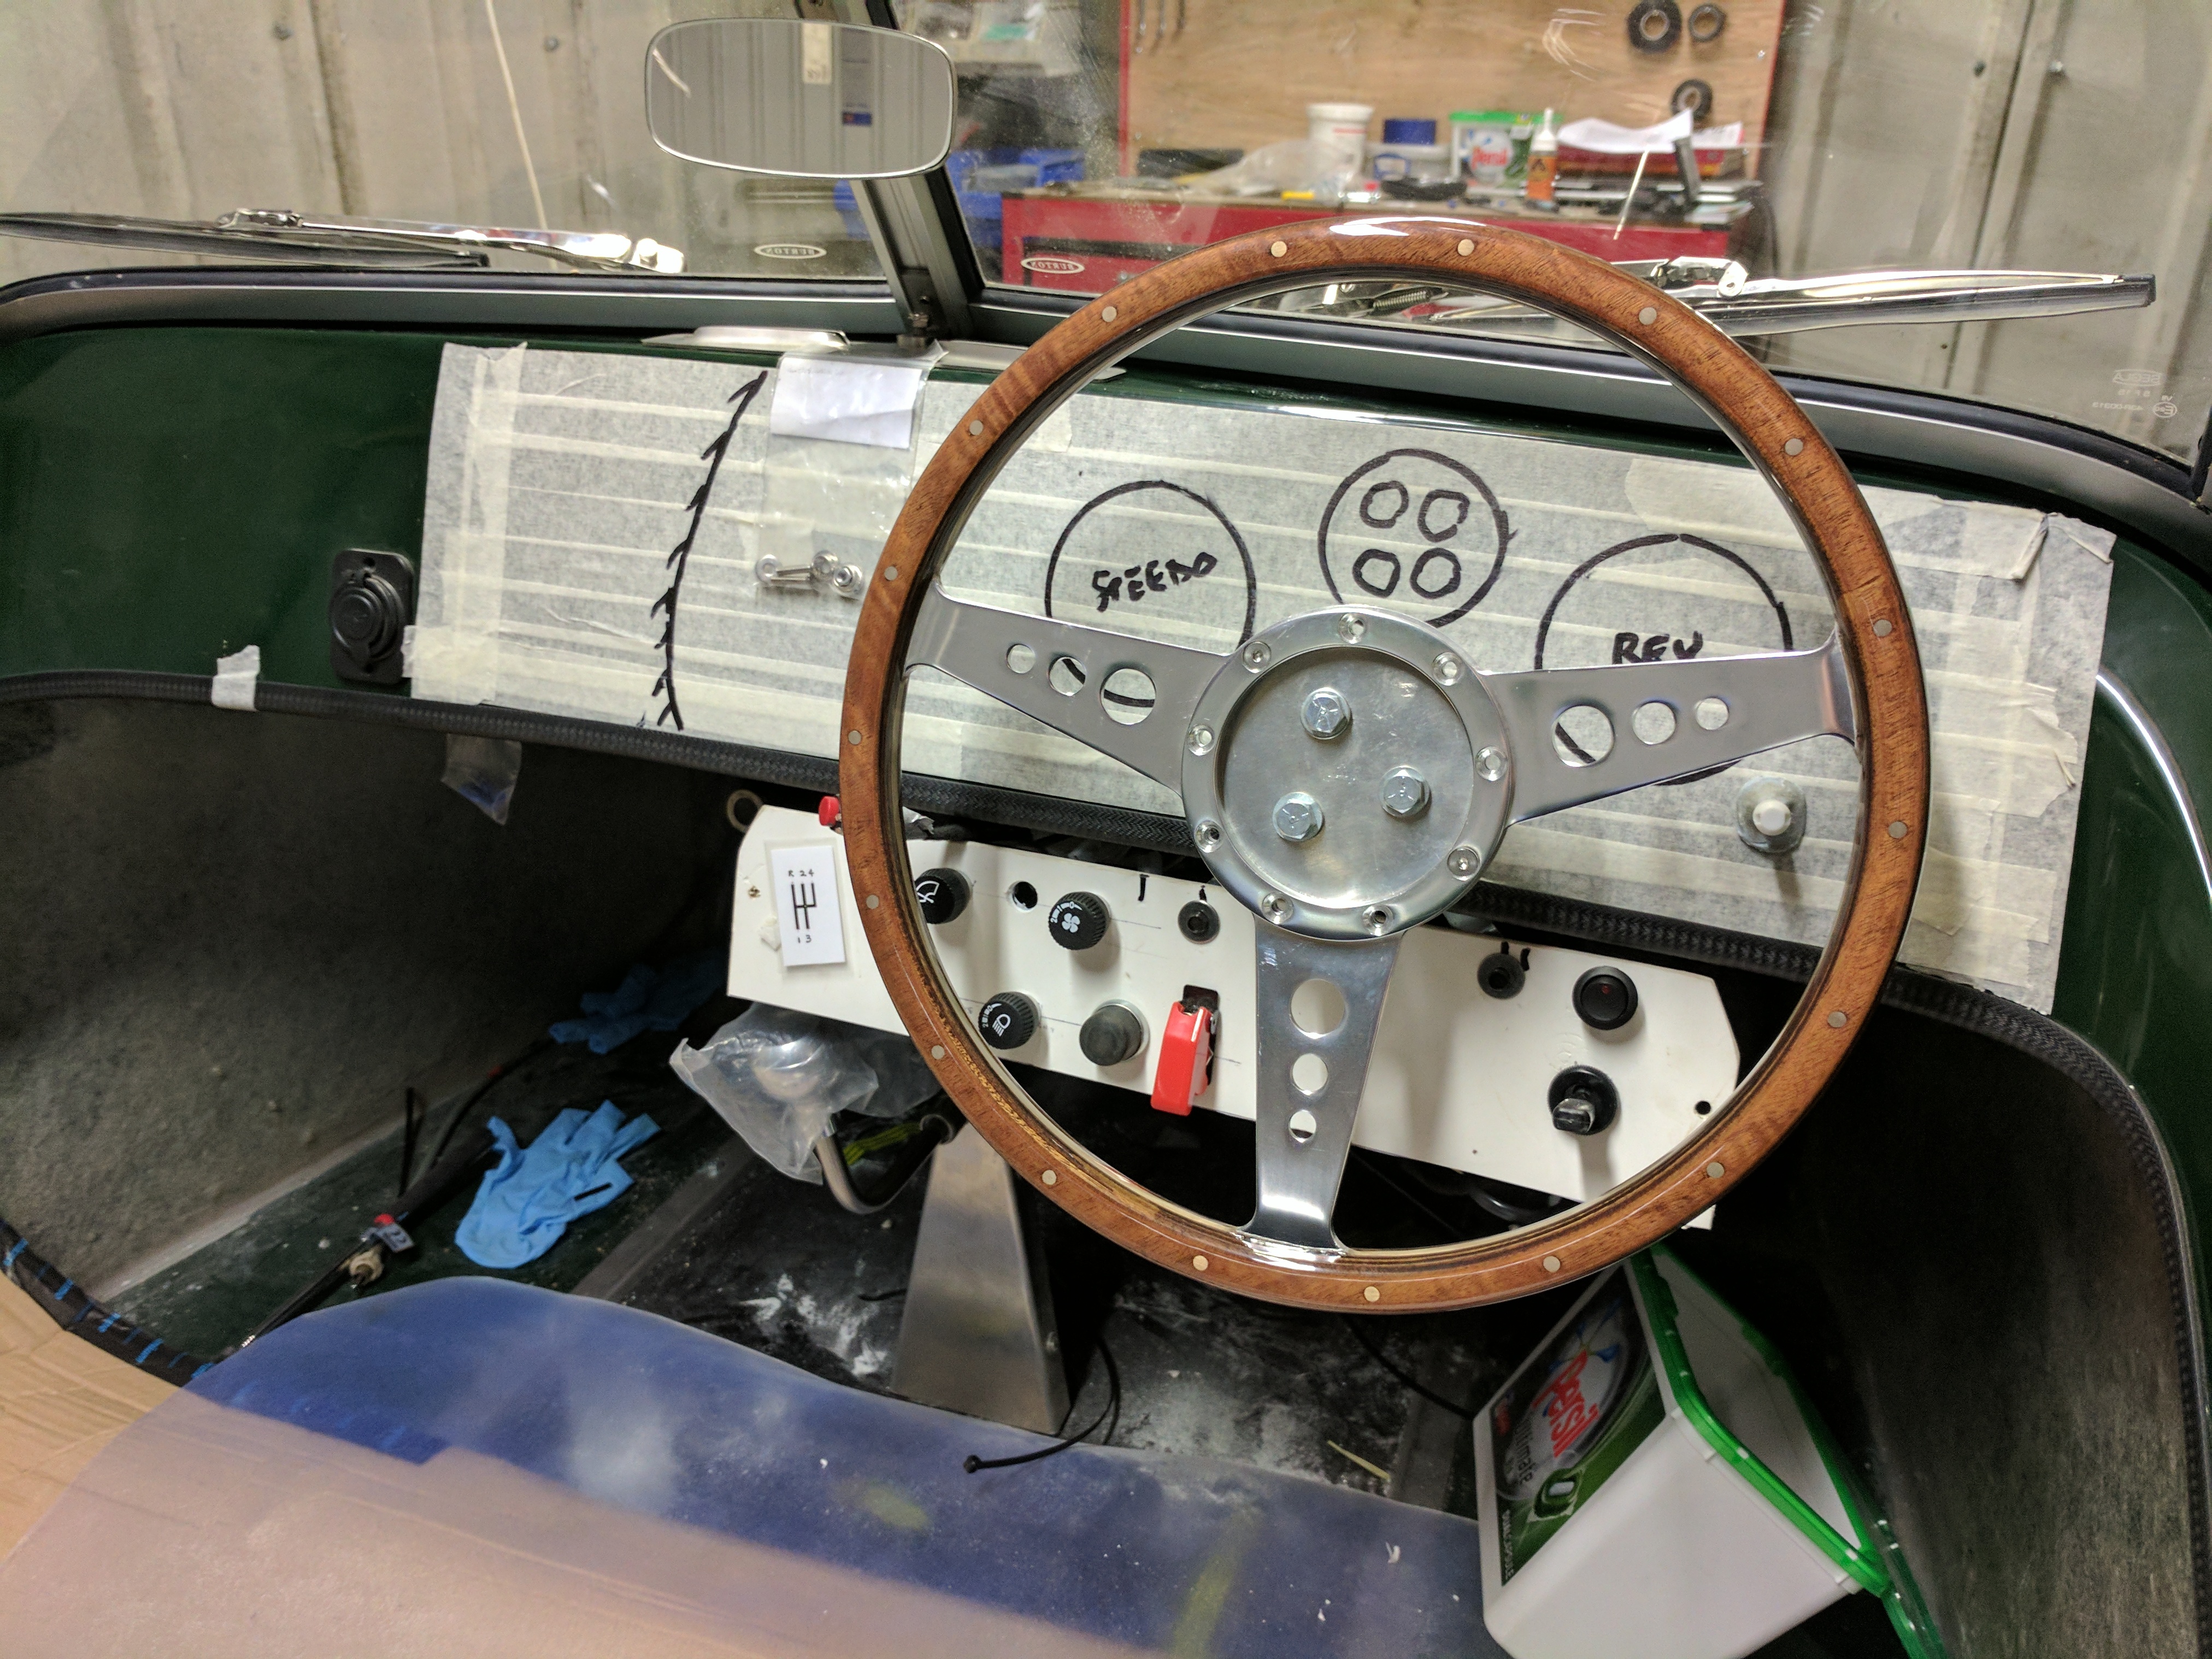
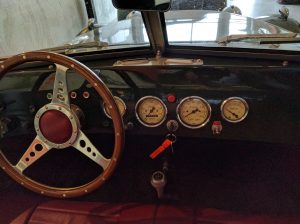
While there, Mark Overbeek, their excellent sales manager, and I, discussed wheels and instruments, the upshot of which was the ordering of these parts for delivery to me in about a month.  I think the instruments will look really good, and given the poor state of the original wheels and tyres, the new ones will benefit the cars looks.

IMG_20160520_123203

The inspection also threw up a few bits that were missing in the original kit Burton supplied, so I took home with me in my bag, among other things,a shorter gear lever, and a bracket for the steering column.  Interesting response from Security at Schipol, who put the bits together in the shape of a gun!  After reference to a senior officer, and my assurance that I was building a car(!),  they let me take the bits on board.   Also with the bits were new Burton exhaust brackets to replace the original poor quality Dyane brackets.

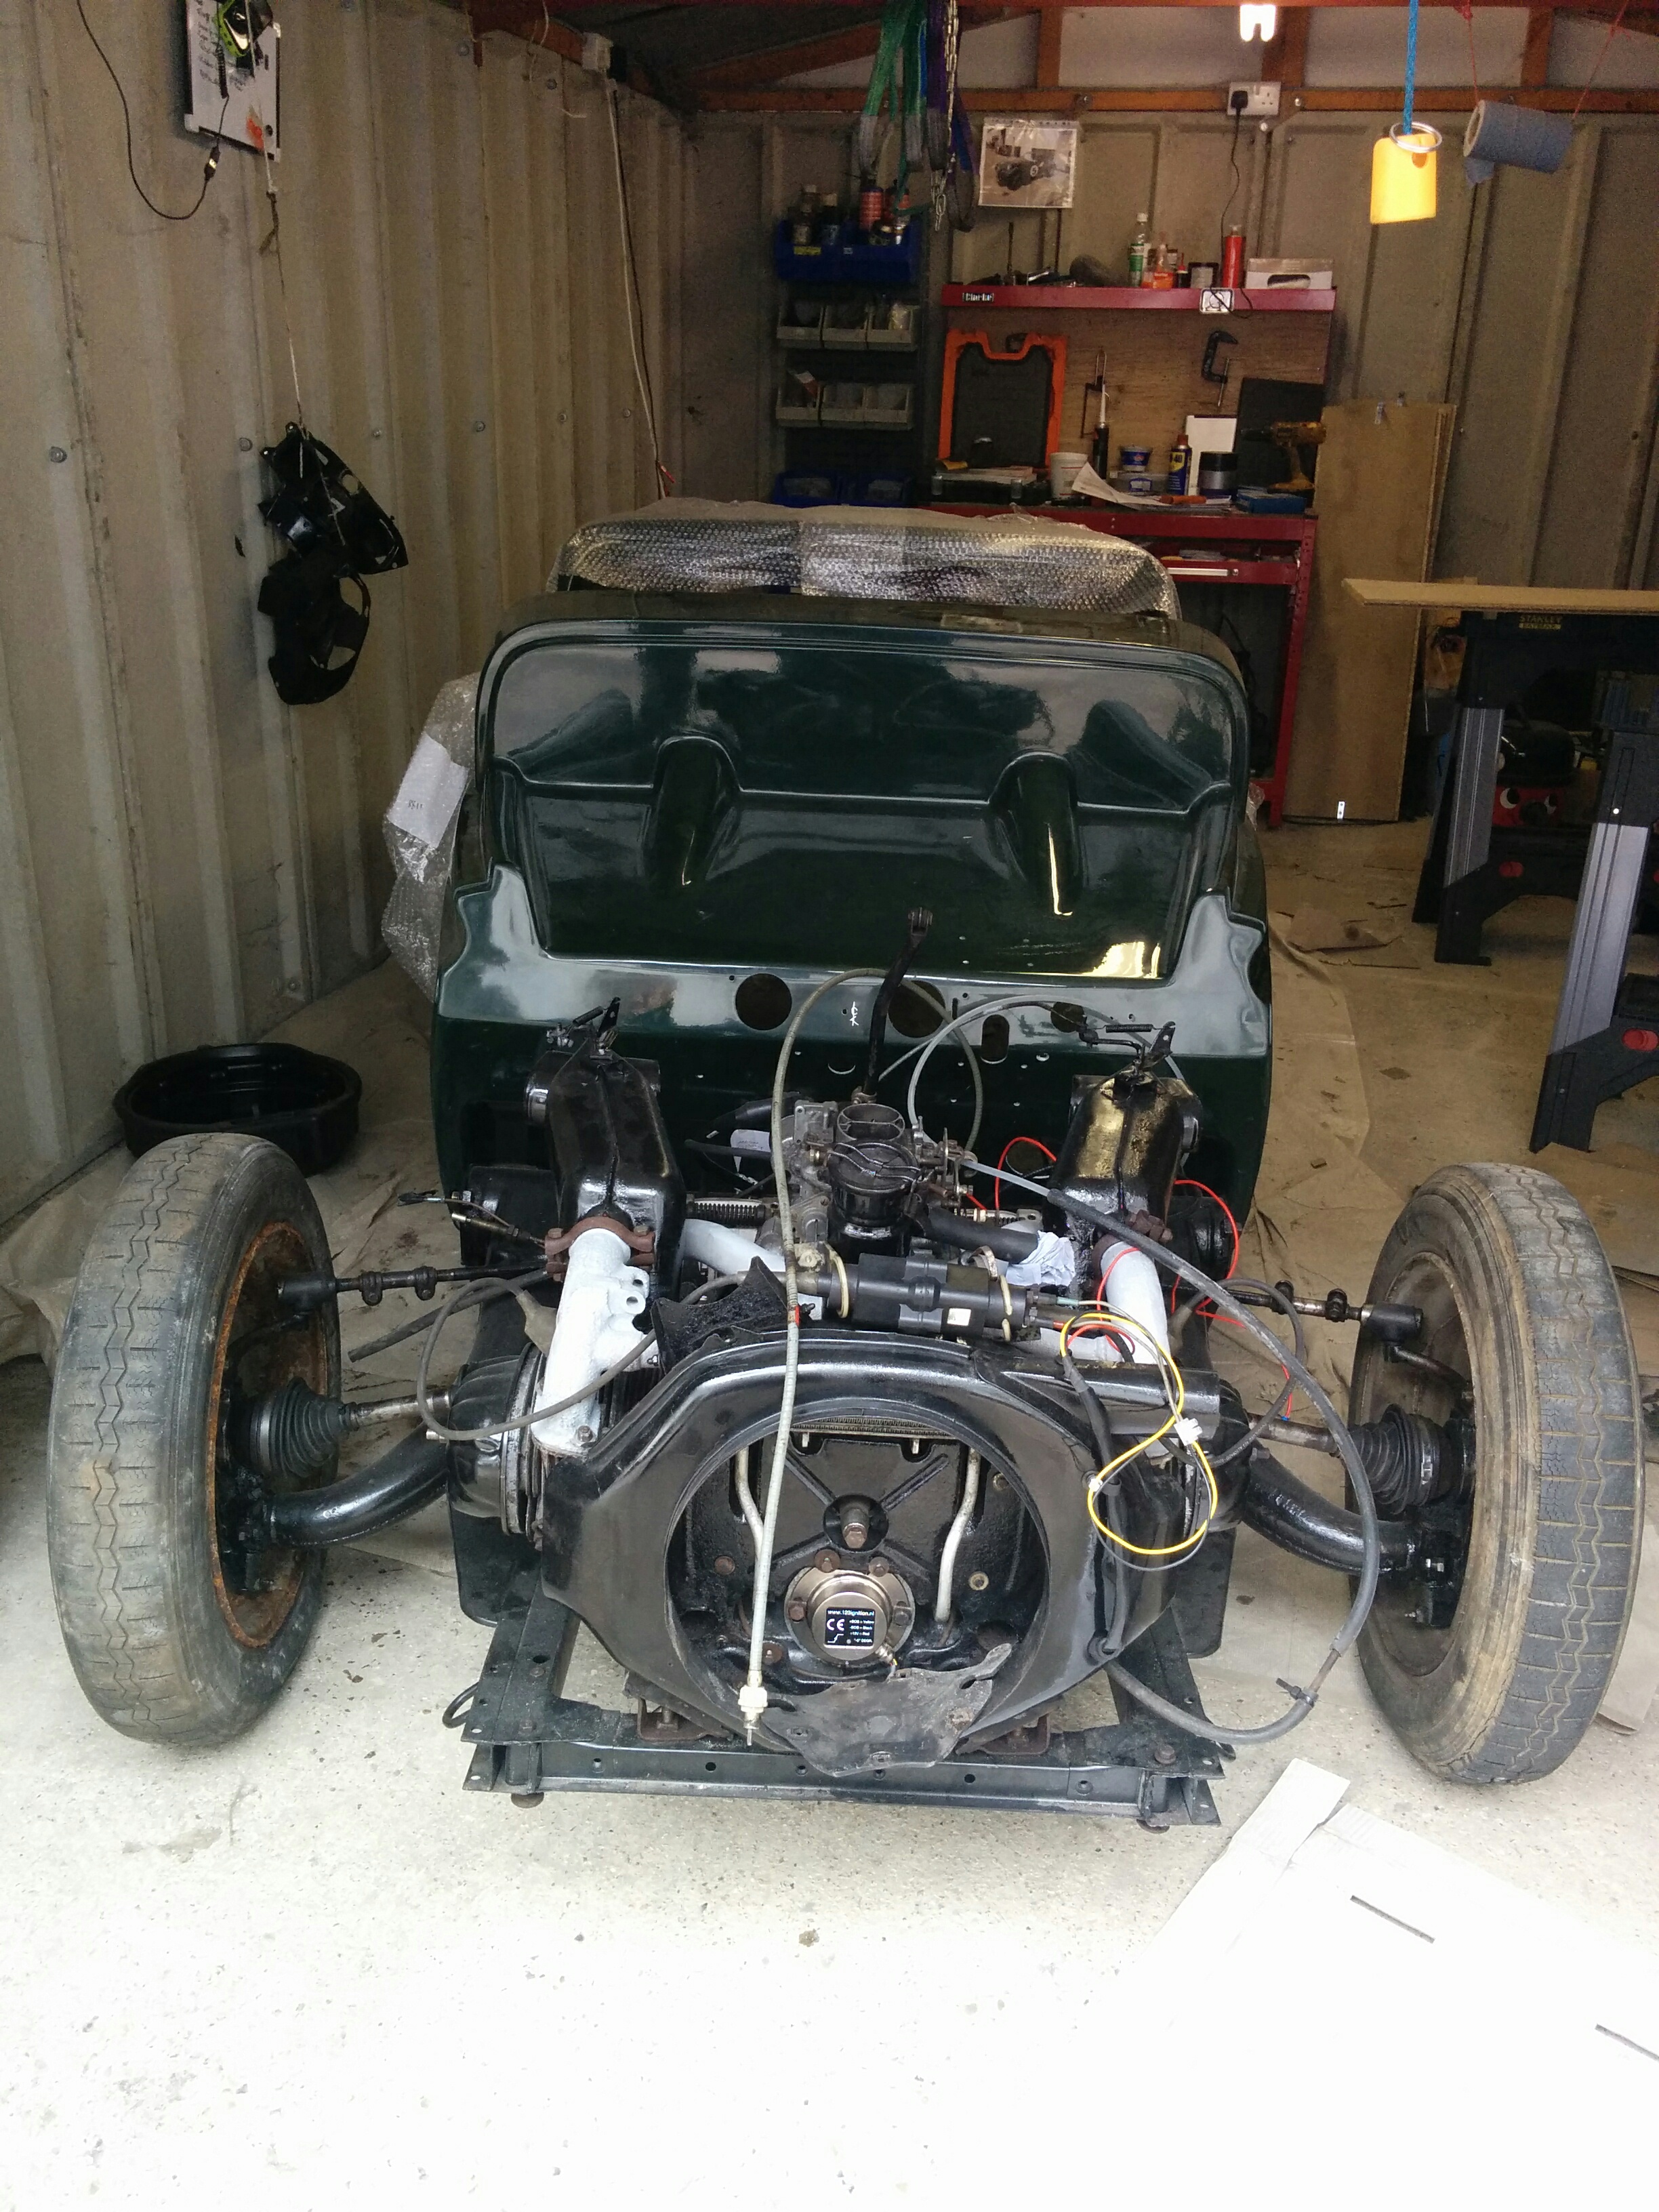
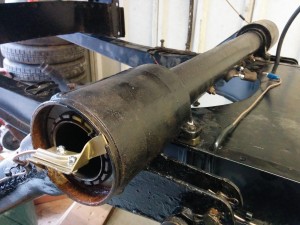
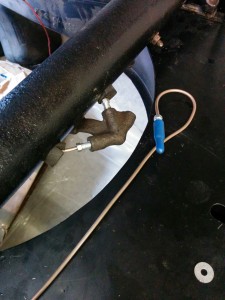
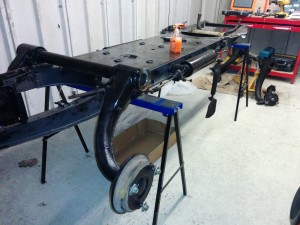
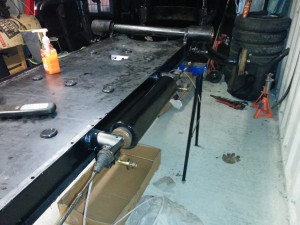
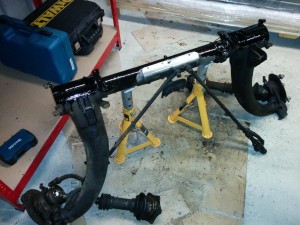
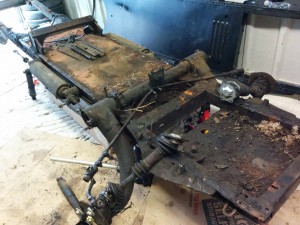
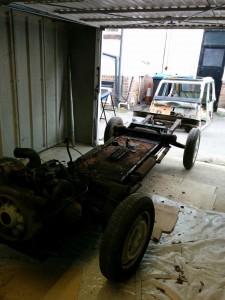
Back at the garage, after having drilled yet another hole for the wiring loom to come through into the engine compartment, I turned my attention back to the chassis and engine.   Following my photo session, I now knew how to run the fuel line complete with filter, and the pipes up to the pump.  I fitted the new exhaust brackets and tightened everything up to look good, and hopefully provide a perfect gas seal.

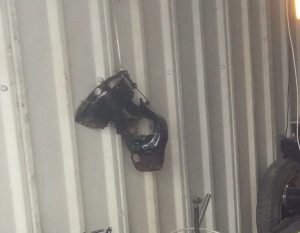
What to do next – of course fit the remaining cowling (that I had hung on the wall and promptly forgotten) around the “pots” and to bolt through to the fan cowling and the heat exchangers.  Yet another “Doh!!” moment.  In order to replace these bits, I have to undo the exhaust brackets, take the carburettor, manifold and (I think) fan cowling off, and then fit the new cowling.  The next job for me to do this week.

IMG_20160403_111053a

That’s all for the moment.  A productive time in preparation terms if not in actual activity.

Next jobs to do, apart from the cowling, include replacing the rocker cover gaskets (leaking after the first infusion of oil), and fixing the wiring loom into the body.   Once that is done, I would like to refit the “tub” onto the chassis and make sure that the steering column and handbrake brackets can be correctly located and fixed.  I might even try the seat/seatbelt framework in the passenger compartment, to make sure I know how it goes together.  The factory tell me that the tub does not sit quite square on the chassis but is a few mm off to the right to accommodate the engine – otherwise the bonnet won’t close.  I need to keep that in mind for the future final fixing of the body!

18. It looks like a car!

Well a bit anyway!

IMG_20160419_120452

To go back a bit, I have spent a very worried time.  First off, I was all ready to set the static timing with my new 123 ignition unit; I was then concerned that when we replaced the flywheel, it should have been lined up in such a way that the timing hole would be at 8 deg BTDC.   Turns out, according to Callum Beveridge at citroenspecialsclub.org that there is only one way.  “Oh yes” says Ed,  “I remember now. There was a lug that locates the flywheel in a unique position” .  Armed with that we tried to start the engine using Easystart squirted straight into the carb.  No response (except sparks at the plugs) – probably just as well, there was still no oil in the engine or gearbox!

IMG_20160415_140244

High tech ignition system!

Next issue of concern was, and has always been, working out the RHD holes on the LHD tub.   Callum again was incredibly helpful with photos of his build and patient conversation resulting in my understanding of how the pedals should go.

LHD Tub

Starting point is the hole for the steering column; everything works back from there. The pedal assembly of course is not handed and simply is moved relative to the steering column.

With Roy and I setting the tub on the chassis, removing it, setting it on again, removing it, circumcising the rear legs of the chassis (15mm chamfered off) to fit under the shell, fitting it back on again, and lining up the screw holes, we were able to locate the hole for the steering.

IMG_20160419_124500

Drilling was straightforward, even if done by an alien(!),  and the gaiter previously ordered, fitted perfectly!   We now understand how the pedal assembly fits (clutch and brake pedals either side of the column) and we have drilled a new hole for the brake master cylinder.      Although Burton suggest the cutting and welding of the accelerator pedal to shorten it, the right hand side gives an opportunity to just bend it and take the cable out higher up on the bulkhead.

IMG_20160419_184740

Examination of the handbrake lever proved that it was too short, but a quick read of the manual reassures me that somewhere in the collection of Burton bits is an extended central section lever!

Roy and I spent some time looking at the front of the car, and I was convinced that the engine seemed off centre, which made lining up the tub apparently more difficult, but we now think it may have been an optical illusion. First off the heat exchangers are not at the same angle to the notional horizontal centre line; then we realised that the gear lever is not central to the gear box and sits on an offset top plate. All goes to confuse the eye (and my brain)

IMG_20160419_120444

Other things are going to be in the way of too much more activity for the next week or so; it will be “mothballed” from the weekend until we get down to seriously getting the engine to work AFTER I have filled it with oil.  I have new air and fuel filters coming and I already have a maintenance kit for the carb, so work obviously there to do.  We need to finish off the holes in the tub and fit the pedals and connect the brake system up to check there are no leaks.  Roy has to design the dashboard and I have to chase up the new seats with their head restraints all from Cobra Seats.

Back in a while….


17. Now for the really difficult bit….

[Just a thought – if you want to be notified when the pages are updated, just leave a comment here with your email address and I can notify you as and when]

Not a lot of reporting here for a while; but quite a lot of progress……  Somewhat less organised work schedule, but with the help of Roy and Ed it has moved forward.

from this:                                         to this:

IMG_20150713_182441IMG_20160403_111112

First off, the rolling chassis is really a rolling chassis! The engine is virtually complete down to the refurbished cowlings and very close to being started since the Dyane acquisition.  Looking at my notes, lots of boring stuff has been done and ticked off, including:

  • painting of heat exchangers and other bits
  • brake pads fitted – boy do you need the knack to get them in properly, but done
  • drive shaft gaiters greased and tied – using plastic ties because I can’t work out the metal fixings that came with the gaiters,  to tie them off
  • exhaust crossbox, into heat exchangers, onto new Burton exhaust – all connected
  • new 123 ignition unit in place and cowling and fixings all back on
  • starter and solenoid checked and turns the flywheel

and then the removal of the “tub” from the crate and moving of bits around the two garages to accommodate the body and the chassis side by side.  Removal of the Cobra seats from their packaging, ready for installation; burrowing inside the Burton boxes to see what they have and haven’t sent me, and what is needed to move onto the next stage…..

IMG_20160403_111053

….which has been filling me with dread.  The conversion of the LHD tub to RHD.

Reading the Burton manual on how to start with the tub and prepare it for the chassis has been interesting.  I have read and reread the section, and only after extensive web work and looking at other peoples photos have I been able to get an idea as to how it should all go together.  Not a criticism of Burton’s manual, more a lack of understanding on my part; senior moments creeping in…   There are lots of pre drilled holes none of which seem to follow any symmetry.

As I say, much reading up on the web and direct emails with the Citroen Specials Club – thank you Callum for all your help – and I am beginning to slightly relax a little about what comes next.  I confess that I seriously considered converting the chassis to LHD rather than changing the body.  Part of the problem I now realise,  is that I have a tub predrilled for LHD.  This means that my additional holes are going to reduce the fibreglass by a very substantial amount!  So I have to be confident that any weakness does not affect the structural integrity of the whole car; because it has a separate chassis I think it will be fine, but I am also investigating putting an extra panel across the holes.   We will have quite a lot of work measuring, drilling and fitting the various components.

Lots to do before we can properly put the the body on the chassis!  I am still looking at the new lockable steering column, which is now articulated (but I can’t find the UJ to go in the middle) and trying to puzzle out how that fits.  I also have to seriously service the brake master cylinder before reconnecting it to the, shortly to be adapted, pedal set.

Next problem to have given me angst has been the potential difficulty of having the car tested and registered.  It would seem that the earlier system of turning up at the DVLA office with the new car and a request for a Radically Altered Vehicle registration which would leave the car essentially untested except as to a normal MOT, is no longer available.  All cars need to have a Basic IVA test which means it also needs to conform to present regulations.  I am coming to the conclusion that I may have to have Q plates for registration as I may not be able to demonstrate fully enough the provenance of the donor car.  Although I have a photo of the original Citroen ID panel, I do not have the original; nor do I have any logbook which the DVSA are hanging onto pending their inspection!   I hope that this blog will provide sufficient evidence of the detail of the rebuild.

I think the Burton will generally be fine, except….. it will need head restraints.  I hope I have now solved that problem by having Cobra Seats  alter them to take a removable head rest.  Cobra say it should be possible and so I might be making a trip up to Telford in the near future!

That’s it for now.  We are about to have a new addition to the family in the form of Millie, a Coton de Tulear puppy and I have a feeling that will be taking up some of my time. Until I can train her to give me the relevant spanners when I want them, I may be a bit limited in the next few months progress, we shall see.

IMG_20160401_121054

16. More progress

[Just a thought – if you want to be notified when the pages are updated, just leave a comment here with your email address and I can notify you as and when]

Lots of cleaning and painting, ready for more engine assembly and eventual testing, but this photo says it all 🙂

IMG_20160308_155633

A good day, with assembly of the engine to the gearbox, via a new clutch.  Slight concern about dropping the gearbox from above onto the flywheel, with no more lining up of the clutch plate other than by eye, but it seemed to go in sweetly – we will see in due course.   Heavy lifting into the chassis, but in fact it went without a hitch, and I remembered to move the gearbox slightly off initially to be able to fit the offside handbrake cable into the handbrake lever, before dropping it over the support.

My notes say I should mention the rear wheel bearings.  Having removed the large nut holding the drum, the bearings were visible and seemed to move somewhat worryingly. However, when we reassembled everything, the nut obviously bore down onto the bearings and tightened them appropriately.  Everything is a learning.

Lots of bits of hardware (mainly for the heating) cleaned up and painted prior to assembly onto the engine and gearbox, but not until we have fitted the fuel pump, and done the timing for the new electronic ignition. This will need the ignition system to be wired up, at least temporarily and without the main wiring loom; and we will need to clean the carb, fit new gaskets and jets and get some fuel into the system.   Note to self – where did you put the CVC box….

Quite a lot still to do before we remove the rolling chassis to the other garage to enable the body tub to come out of its wrapping and start some of the assembly work for that.

But more progress…..

15. Progress

We have spent quite some time in the workshop over the last few weeks, and are gradually moving on!

However, in the spirit of one step forward and two steps back, I have decided to scrap the old calipers for the front brakes and buy new ones.  Main issue is safety – it is silly to compromise on brakes, steering and tyres – so ECAS have yet another order from me, this time for complete caliper kits which should arrive shortly.  This may have the additional benefit of the disc running smoothly in the centre of the caliper rather than slightly off on the nearside.  Big decision in my mind as to whether to publicly announce my latest “doh”  moment, but….

IMG_20160226_152021IMG_20160226_155847

The two photos show the front brakes mounted – my first attempt is on the left, the second and correct fitting is on the right.  This explains why the handbrake cables didn’t run correctly first time.  In my defence, I got confused by articles on the web referring to drivers side which turned out to be for a left hand drive car.

Having got the admission out of the way, I can confirm the following has all been done:

Cleaned fly wheel ready for reassembly with the clutch
Fitted new clutch release bearing
Replaced ignition with 123 electronic
Cleaned and degreased engine shrouds and painted

The fan cowling may need replacement but first of all we can try to fix it with Ed’s TIG welder

In the same period I obtained a few storage boxes – which makes the workshop all much neater.     I also recharged my neighbours battery in her beautiful Issigoni mini, much to her satisfaction – and mine because it repays in some way my use of her parking space.

IMG_20160301_153807IMG_20160229_160724

However, I have also tried to fit the Burton exhaust and have been defeated.  I have emailed Burton, and from their reply it seems that a (vital) bit seems to be missing from the kit.   At the same time I have asked for a practical translation of some Dutch to help me identify some nuts and bolts they have supplied.   How to translate:
kacheldoorvoer/remleidingklem
bankbevestiging
handremgeleiding

(answers on a postcard, please)

I have decided that it is time to get the engine re-mated with the gearbox and installed onto the chassis.  I can then try to get the engine running and see whether it does need to be stripped and rebuilt or whether I can move on to the next stage of fitting the body tub,  That will be our task for next week – we will see how it goes!


14. ….and so on

Long time since the last post. During the period I have continued with the renovation of the original parts. So, as of this date the build is as follows:

Suspension – completed

Rear brakes – completely reassembled

Front brakes – in the process of full refurb.  Pistons popped out nicely with the foot pump!  New seals and connectors together with new pads for both foot and handbrake. New discs obtained from ECAS as they were only £39 for the pair – not worth trying to salvage the old ones at that price.

Engine and gearbox – steam cleaned; much nicer to work with now.

IMG_20160201_160925IMG_20160218_154610

Cross box cleaned, small hole patched with gun gum and painted with very high temperature paint. Assembled onto gearbox and loosely fitted to the chassis.

IMG_20160218_154637IMG_20160212_153430

Wheels fitted, hoisted off trestles and chassis rolled out into the sun and back in again (to the accompaniment of Vroom vroom noises!)

Trestle collapsed as I lifted the chassis off, so new trestles purchased.  Look great, but so far I can’t hoist the chassis high enough to lift it back on!!  Will wait for help to do it properly.

Back to the garage tomorrow to see how much further I can get!!

13. Boring but (in some ways) important….

The last few weeks have been both seemingly less productive, and more boring.  I have snatched hours when possible rather than spending whole days at the garage.  So when asked how the car is coming on I generally wince and say nothing much.

But I sat down and reviewed what I have done.  While there has been nothing sexy(?) or dramatic, I have done things.  In part I have swollen ECAS’ profits by buying more bits and tools, and in part I have achieved a record Amazon shop with parcels arriving everyday for two weeks!!  But mainly, I have done things ordinary and time consuming, but done!

Starting from the back of the chassis, I have cleaned out and bolted in the fuel tank and fitted a new fuel gauge sender unit. I have removed the rear drums (10 ft scaffold pole and 44mm wrench did the job easily) and removed the old slave cylinders, shoes and springs.  I have painted the back plates and after a second coat will fit the new cylinder and shoes on each side; at that time I will be able to connect the brake pipes currently blowing in the breeze on each side of the rear axle.

Moving forwards to the front, I have fitted new shockers, and painted a second coat on the front axle.  With both drive shafts gunked and cleaned up, I have fitted new gaiters (3 on each side!) and squeezed new grease into the UJs.  I have also removed the track rod ends, checked the ball joints for wear (I think they are ok) and replaced the bushes and springs and gaiters.

A point to bear in mind if anyone is foolish enough to be relying on these posts for detailed help!  The track rod ends need to come apart if new gaiters are to be fitted. They come undone only with a special tool from ECAS. The tool supplied is good at undoing but when doing up the new screwed ends I found it does not fit. I have used the old ones as they look in good nick, but I have some new parts now lying around if anyone wants them.

Reviewing the car objectively, most of the bits I have retained are in surprisingly good order. The axles have all been well greased and apart from the surface rust, quite clean; the brake shoes and discs are in reasonable nick, although for safety I am obviously renewing them.  Given that the car was apparently in a field for 20 years aside from the body and chassis rust, the other working bits seem mostly salvageable. I am hoping the same will be true for the gearbox and engine!

I have had an opportunity to use my degreasing tank.  Having assembled it some months ago but not tested it, I filled it with water, connected the power and switched on the pump to aid cleaning bits and pieces. Nothing from the pump; however the bits cleaned well in a fairly strong Gunk solution. Then it was necessary to empty the tank – 20 litres of muck. To cut an embarrassing story short, I now have a hose with an inline tap running from the drain hole into the drain ini the garage.  May not be legal but it works, and nowhere as messy as when I first drained it.  I have also serviced the motor which now enables the pump to work!

The front disc brakes are the next task.  Currently they are disassembled although with seized pistons. I am hoping that my foot pump will push them out. The calipers look in reasonable condition and should clean up ok. Then the gearbox will have to be disconnected from the engine when Roy and Ed show up, to provide some heavy lifting.

As I have said before, I am hopeful that I will get a rolling chassis within the next few weeks that rolls, steers, suspends and brakes!  That will be the time to think about the main part of the body going onto the chassis.  It will also be the point at which the 200 euro reduction for receiving a LHD body for a RHD chassis may be recognised by me as a suitable reduction 🙂     Probably not…..

Winter is now with us and apart from dressing warmly, the heater is going full blast when I am in the garage to keep me warm; works ok now but I think some means of warming drinks is probably going to be necessary soon.  Any one passing will be welcome to hot tomato soup on demand!

And that’s enough rambling for the moment. See you here soon.


12. Christmas Crackers

Not much to show for in the period leading up to Christmas and the New Year.  That is not to say that nothing has been done, but very slow progress.  As ever, two steps forward and one step back.

Brake lines in, but we removed the nearside again as the locating lug on the pipe was still not locating in its hole in the rear axle.  An hour or so later we put it back as it was, having been unable to do it properly.  However, our consensus view is that the pipe is so well fixed that it will not be able to move and therefore strain unnecessarily. The substantial rubber gasket where the pipe comes out to the three way connector is very important!

More scraping done on the front axle cleaning it up, ready for a bit more dismantling of the steering track arms and the hubs.

New 44mm socket bought from ECAS as a special tool is needed to give access to the rear drum brakes and the wheel bearing.  Old one going back to Amazon!  I note from the ECAS website that to remove the bearing will need a pneumatic air tool (and compressor) so that job may wait for a while.

Meanwhile Ed has been dismantling the cowling around the engine/gearbox, particularly to allow the gearbox to be removed and fitted to the chassis and to allow work on the front calipers and discs more easily. The gearbox will need some considerable cleaning up before it is installed.

….then I get a phone call from Ed to help him pick up a mobility scooter to see if it might be brought back to life ready for a neighbour of his.  After some dismantling and connection to fully charged batteries, it seemed that the motor was probably unserviceable. Sadly, we took it to the dump for its final resting place.

Emails to and back from the Chinese manufacturers and the UK controller importers confirmed the age of the bike as being too great for them to have retained any technical information that might have helped.  It did occur to me to do a Google search on racing mobility scooters and discovered that they are indeed raced and achieve speeds in excess of 100 mph using a 125cc scooter motor.

I emailed Ed and he replied “Nay, nay, and thrice times nay!  But for those who do not think it might be a Crackers idea have a quick look here!


11. Is that the end in sight….

… or is it a mirage.

A fair amount of detailed work now being done.  Scraping off, and painting of the old items. Replacement where necessary (shock absorbers); and refitting the brake lines.

A “doh” moment with swapping the brackets on the old rear axle brake lines. In the kit were nuts and bolts. for some reason I could not make the connection between them and where they might be fitted.  Could they be for fixings – no, I had plastic brackets.  I spent a long time replacing the drilled out rivets with nuts and bolts of my own, sawing them down to fit inside the axles tube,  and spending literally hours trying to get everything located correctly; only for it to dawn on me – they were there to refix the bracket rivets, the correct size, and easy to fit. The LHS took hours, the RHS with the correct fixings took less than 10 minutes!

Along the way I managed to lose an important bolt into the chassis again.  It is a habit of mine now having lost several before. Much thanks to Ed for having retrieved the previous ones and this time supplying a magnetic grab with which the the problem was solved.  A new one is now on order from Amazon which will be £3:95 well spent!

Running the brake lines is slightly more difficult in a right hand drive car. The master cylinder to be mounted on the RHS dictates that the pipe goes down the right hand of the chassis, turns into the centre of the axle – and then finds the connection on the wrong side.  I sent a photo to Burton who responded incredibly quickly demonstrating that the pipe needs to be bent back on itself to fit.

IMG_20151203_150755IMG_20151203_150701

Next job is to look at the rear drum brakes.  Another “doh” moment as I attempted to remove the drum by undoing the nuts at the back, quickly realising that these nuts are there to adjust the shoes.  I have a similar problem with the front hubs, how to exert enough force (252 to 295 lb/ft) to undo the centre bolt.  I have seen a specialist tool used for the fronts as the hub turns independently of the drive shaft. I am thinking it will not be so bad for the rears as the hub is fixed to the axle. Nevertheless, I am going to need something and might try to hire the tool or see if there is a friendly Citroen dealer who can lend one to me. Alternatively, there is the Forge is Cobham which might make something up for me.  Given the torque values my trusty scaffold pole will certainly be useful again.

I had some new visitors today – a little boy and his dad who wanted to know what I was doing. Showed the photo of the completed car and said it might be done by May next year!!  I am not sure I believe it, but I am so enjoying every bit of working through to that end!


10. Work in Progress


Since bringing the body back home (!) we have been hard at work.  The old chassis has now been cut up ready for disposal, and the workshop rearranged to accommodate the body (still wrapped up) and access to the new chassis on trestles.

Roy had been hard at work cleaning up the rear axle and painting it and it was ready for attachment again.  Having the odd hour I thought I would pop the axle on by myself in the hope that, in my imagination at least, the project would start looking like a car again. With that in mind, I set up a hoist from the roof truss and dangled the axle over the approximate position.  Not a hope – other constructors please take note this is a two man operation 🙂

IMG_20151124_165422

A week or so later and Ed and I were able (eventually), to get the rear axle fitted back on to the chassis.  Very difficult, not least of all because it was necessary to wait for Roys advice, in absentia, that the studs for the front and rear were different in length, and we were trying to use a shorter one by mistake!!

A week or so before Roy, Ed and I had spent some time trying to get the eyes off the end of one of the spring boxes (nothing to do with the South African rugby team!)  With much grunting and differential heating the inevitable happened – the rod snapped off.

A search on the web and ebay found Martyn Wilson of 2CV Classics who offered me a refurbished spring box which I went up to collect.  He has a a load of second hand 2CV equipment and must be a place to call for other bits if necessary.

IMG_20151124_165538

Back in the workshop we were able to get the spring boxes fitted and with Eds efforts, after cleaning the threads had all the eye bolts screwing well.  In the meantime I spent some time cleaning the “bridge” and the main shaft of the front axle and subsequently painting them.  I want to get the front axle mounted as soon as possible and then complete the cleaning and painting so that we get closer to a rolling chassis when we want it – and also to get some leverage on the drive shafts, if it is necessary to remove them.

On cleaning the shock absorbers have been found to be no good – rusted through in parts, so I am ordering four new ones from ECAS. They are cheaper than I expected and will certainly be a major part of any SVA testing, so they need to need to be good.

I have freed the petrol sender and checked the filter inside, which looks ok.  I will get the tank cleaned out – maybe steam cleaned – ready for fitting.

Next heavy lifting is to get some new polythene sheeting under the chassis and to protect the floor. At the same time the muscle power can be utilised to lift the front axle into place as well,  giving a lot more circulation room and easier working on the front axle and steering

.IMG_20151124_165524

I am anxious to make a start on the engine preparation, but sensibly, Roy and Ed are holding me back to get at least to a working rolling chassis.  Realistically we are probably not going to have much time for work in the garage as Christmas approaches, so the next blog entry may well be in the new year.

Merry Christmas to all our readers!!  🙂

9. Double Dutch

The factory confirmed the body was ready so arrangements were made to get there and pick it up.  Small problem reported by Burton – the body shell, by mistake, was supplied to them for a LHD chassis and running gear.  Instructions for drilling new holes and some small negotiation later and a slightly smaller sum was transferred to them.

So on Tuesday, Ed and I went to Holland.

We hired a long wheel base van, courtesy of Badshot Lea Van rental, and drove to Dover.  After boarding the DFDS ferry to Dunkirk and arriving in France, we set off to Zutphen in Holland where the Burton Car Company lives.

Long, long journey because of bad traffic around Antwerp, and then again Eindhoven (home match for them just at the wrong time for us!!) meant a very late arrival in the town. Just time for dinner and then bed.  8:00 am start and 9:00 pm finish meant 12 hours travelling – that wasn’t meant to be…..

Wednesday morning, up early and off to the factory.  Met by Mark Overbeek of Burton Cars who very efficiently loaded the box containing the car body together with other bits, into the van.  This much to my amazement as I had become convinced that my initial measurements were wrong; we were after all putting a car inside the van! In the event all was ok.

Off we drove.  Much better drive back and having left Burton Cars at around 10:30am we were able to have lunch in Belgium, before getting the ferry (in France) at Dunkirk, just making the 4:00pm ferry.  Only slightly delayed by the UK Border Agency guy asking what was in the back. “A body and some booze” didn’t faze him – but he checked anyway.  Frankly we were more concerned about having immigrant bodies in the back, but we managed to avoid that problem.

Ed sensibly arranged for his son Toby to meet us at the garage when we got back to Surrey and having determined that the van did fit under the archway to the garage, the three of us unloaded the “body” into the garage where it now sits.

All in all a successful trip and we now have more or less all the components for the car and just (huh!) needs the cleaning, replacing where necessary and rebuilding, ready for the assembly.

I realise there have been no photos!  We were too tired to think about adding to the colllection, so the best I can do is show the box taking pride of place in the garage.  Some rearrangements necessary together with the acquisition of some castor wheels to move stuff around (on their way from Amazon, where else!)

IMG_20151106_111616

IMG_20151106_111653IMG_20151106_112017


8. RTFM time

Morning spent in assembling the new engine hoist which I have purchased.  Some hours later and with a sense of how the Chinese express themselves, (by my reading the manual) I was able to make slow progress with the build.  A combination of poor Chinglish and distorted explanations and drawings took its toll, but I am pleased to report it is now put together and already providing service.

Ed came up with an alternative “scrappie”   and the garage has been cleared!  The very nice man with a van came round and took away the body.  Ed and I helped him to prepare the body to put it on the lorry (along with a bunch of other stuff already collected).    I was let loose with the angle grinder and satisfied a primordial desire to cut up bodies.

IMG_20151020_150220IMG_20151020_150227

Note the number if you need anything scrapped.   Very much recommended.

Clearing the garage, has meant the donor chassis is now up on trestles and therefore much easier to work on.  The idea is to set up the new chassis immediately adjacent and then transfer components from one side to another after cleaning.

IMG_20151020_153147

The body is ready for collection in Holland!  I just need to sort out what extra bits I need from Burton to replace or supplement the bits that are being salvaged from the donor car;  the Burton Manual is pretty good and shows the order in which the kit is reassembled.  Having modified the Order,  its off to Holland in a van and to bring it all back.


7. Now we’re motoring

A Good Day today!

Up with the lark to Surrey Hire and Sales in Addlestone to pick up an engine hoist – £15:24 for 24 hours, tremendous value.  Lugged it to the garage, set it up and attached the cradle to the previously exposed exhaust manifold and started hauling.   The engine and gearbox started coming up off the chassis – and then the chassis started coming up as well!! A quick inspection showed that the handbrake cable was still attached to the handbrake lever!  A choice – undo the caliper at the brake end to free the cable or, and as I did, free off the two remaining bolts attaching the brake lever to the chassis.  In my defence, it was pretty well inaccessible before the engine and gearbox exposed them.   Once free the engine and gearbox swung in the breeze.

IMG_20151013_110218IMG_20151013_110206

By this time Roy had arrived and between us we maneuvered the engine onto the bench ready for taking apart and eventually rebuilding.

IMG_20151013_112031

Meanwhile, the chassis needed attention.  Today we, (but mainly Roy), have managed to get the petrol tank out, the rear axle off and some of the suspension.  IMG_20151013_145914IMG_20151013_121535

Some hard work to get the track rods off the wheels, and we have the steering rack with track rods still attached until we can work them loose ready to be refurbished.

IMG_20151013_145855IMG_20151013_145859

But the chassis is looking slightly more bare and that is good.

IMG_20151013_145845

So the next visit should see the rest of the stuff off the chassis and we can start refurbishing as necessary.  On balance the chassis and its components look remarkably good for a “barn find” car that has spent 20 years out in a field.  The chassis is obviously not original but it is in good enough condition that I keep wondering whether to replace it with the new ECAS chassis.  I think I will but the old chassis may well have some value to someone else.

Unfortunately, I heard today that the scrap merchants I had line up to pick up the old body have decided it is not for them, so some phone bashing to find some one new.   We need the room as more bits are lying around on the floor!

We have a new recruit, Ed King, a mate of mine and a TR2 owner who therefore knows about these sort of things, who has offered to help as well.  Team Noble is growing!

Anyway, a good day today and a sense of progress!

6. Back to the Grindstone

Nothing new to report other than below, as I have been away on holiday

But, before going off Roy and I took the body off the chassis.  It was all prepared with all the bolts being undone and then with careful rocking from side to side (as recommended in the manuals) the body separated from the sticky strip laid down to seal the gap between shell and chassis.

IMG_20150903_114424      IMG_20150903_115154

I can confirm that it is possible for two geriatrics to lift the shell; by putting their aged bodies to levering scaffold poles between chassis and shell, and then pushing the chassis away, and off it came.  The scaffold poles then acted as rollers to get the body back into the garage to await disposal.

Only a small crowd gathered to watch (well, one actually) and there was no cinematic record of the moment; the photos here will have to do.

IMG_20150903_123628

The garage is now getting crowded, so I have to arrange for removal of the body by Scrap Merchants.  Then I propose laying the new chassis next to the old one and gradually dismantling, fettling and assembling from one to the other.

Timetable has now been worked out and every Tuesday (plus others if possible) Roy and I will be labouring on site.  Dramatic news from today is that the cafe on whom we would have relied for lunches is likely to close unless Sam who runs it, can secure a deal with the owners.  This may have a severe effect on productivity.

5. Bits and bobs

Not a very productive week or so – too many other things going on.

I have now removed all of the (visible) bolts securing the body shell to the chassis. Some came out easily, others only responded to shouting and an angle grinder!  Some small concern over the amount of sparks generated, but nothing gone up in flames yet. I do confess to sneaking back to the garage to check again that there was no ongoing smouldering!   I think the manuals all lie and there are some more bolts to undo from the rear underside as the body is still sticking to the chassis!

I have also dismantled everything around the engine and have one further recalcitrant bolt to the engine mount.  Flame thrower now purchased so will apply some heat treatment to experiment with differential expansions….  Hoist acquired ready to lift the engine out and onto the engine support ready to start some proper dismantling and engine fettling.  Always two steps forward and one back… will the roof truss support the weight and, bugger, I need some new shackles to secure the top block.

Still more friends being made from passers-by.  Normally starts with a furtive look from them, moving onto more obvious interest, and then a conversation.  I didn’t realise so many people in Horsley built and rebuilt cars!   Sam in the cafe is also under pressure to know what is going on in the garage, so I now have a picture of a Burton ready to show what it will look like.

More trips away for me, mean no work for a week or so, but maybe the penetrating oil will have finally had some effect.

4. Still more hard work and slow progress

Good thing I am retired!  I am able to go down to the garage most days for at least a few hours.  My program, normally worked out at 3:00 am, while I am wide awake, has been to get the body off as soon as possible in order to make space to run the old chassis side by side with the new chassis and allow me to remove, clean and install each element.  Nice and orderly.

In reality, each removal is difficult.  For a car that has been left outside in a field for 20 years, I suppose I should not be very surprised.  But each bolt is seized, each nut difficult to get to.  Amazon account has been hit again for nut splitters, Plus Gas (recommended) and a propane torch.

I have alternated between getting the engine and gearbox ready to lift out, and removing all bolts tying the body to the chassis ready to lift the body off.  When I hit a problem with one I move over to the other.  This means that photos are useless as there is very little to see!

The last problem was the steering column. The Dyane has a steering lock which is not identified in Haynes, nor anywhere else on the web. The instructions were so wrong that I have had to work it out myself.  The steering lock is irrelevant to lifting out the steering column; when the steering column comes part of the way out of the rack, loosening the bracket at the bottom of the shaft is not enough, it has to come off; the conical bolts (who knew?) are designed not to come out – but don’t need to, and my hacksawing, angle grinding, hammer hitting, and swearing were not necessary. If you do it right it just comes out easy.

I have undone the drive shafts from the engine ready to lift out; then read the manual that suggests that in order to be able to undo the axles it helps to be able to hold the wheels from turning by putting it in gear – can’t do that now, so I anticipate a problem removing all the hubs.  More 3:00 am problem solving to be done I fear.

I am finally left with one mounting bolt too seized for my weakling body, hence the nut splitters and the propane gun.  I shall heat up the nut and expect the bolt to miraculously undo.  We will see.

Off for a Thai meal with Jane, to explain why I havent done many chores around the house, and why I still need to go to the garage tomorrow…..

3. Hard work

Image

OK – so now the hard work to get to something usable as the basis for the Burton body. Having seen the various videos on the web about dismantling 2CV bodies, it was obvious that this stage was going to take no time at all.

Wrong! Each body panel has rusted and/or impossible to reach bolts; each doors’ hinges secured by impossible to turn female hex sockets. Solution – easy; buy metal drill bits and drill them out.

No! Assemble the angle grinder, grind off the heads and using brute force, pull the doors off. That worked, although at much personal cost in terms of strength needed – not to mention the showers of sparks from the grinding. “Did I protect the fuel tank?”

Last problem with the body is to undo the final bolts holding the shell to the chassis, and have the shell taken away to the scrap yard. I have now contacted several scrap yards, none of whom seem to want to come and take them away. Looks like I am going to have to cut the body down and stick the pieces in the back of the BMW and take them off to the Council dump.

IMG_20150725_175702IMG_20150725_175648


In order to finally separate the body from the shell, I have disassembled the hand brake, brake master cylinder and pedals. I still need to pull the steering column from the steering rack, not yet sure how to do that, so no panic yet about scrapping except I really need the room in the garage. I can see that logistics are playing, and will play, a large part as to how successful this project is going to be.

IMG_20150725_175746

Anyway, I am still very enthusiastic, and making many new friends as they pass my open garage and stop for a chat!